
Overhaul Brake Master Cylinder
 Diving Deeper
 Read around 2,700 times
 For Everyone
Updated:
Before attempting this job, make sure the vehicle is on flat ground, in gear, with the handbrake on. Once you remove the brake fluid, your foot brake will no longer operate. Use chocks to secure the wheels.
Removal of brake lines will introduce air into the braking system, necessitating additional jobs. Please don't start this job before making sure you have everything you need for the following jobs as well:
1. If your van has a hydraulic clutch that shares the brake master cylinder reservoir, you will need to bleed the clutch after completing this job.
2. If your van has ABS, you may need to bleed the ABS module after completing this job. See warnings on this article.


If your brake pedal feels fine with the engine off, but then sinks to the floor under foot pressure when the engine's running, you might well have a problem with your master cylinder. Naturally, I know this because that's exactly what I've just had. Here's how it went down:
My brakes were sharp and the brake pedal felt normal, but braking produced a nasty screeching sound. That means it's time to change your brake pads. I did so. It's an easy job. But then what? Spongy brakes. I'm talking best cake in the quaintest village tea shop spongy. So I bled the brakes. That's what you do. But could I get a hard pedal? I bled them facing up a hill, I bled them facing down a hill. Nothing helped. There must be air getting into the system during operation, and that means seals have been unseated, torn, worn out or inverted. Time to investigate.
Sure enough, my research confirms my theory, and it seems that there's one cause more likely than any other. But it's an odd one, because I've changed as many brake pads as I've had close encounters with the ticket inspector, and never before have I had this problem.
It seems that, on some vehicles, you need to open the fluid draining valve before pushing the brake pistons back into the caliper, otherwise the back-pressure can invert the plunger seals inside the master cylinder. Don't worry, I've added this step to the brake pad changing article, so nobody else will make that mistake. It leads me to this tasty job right here, and I've created this article to help you through it, in case you made the same mistake I did.
Let's Get Into It
You will need an assistant towards the end of this process, to help you bleed the cylinder and brakes.
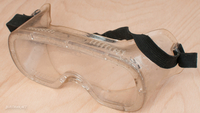
Before you start, prepare an empty container to receive old brake fluid. Put it on a stable surface, so it won't fall over and pollute the local area. Put on your protective gear and keep your mouth closed; you don't want any of the fluids in this post getting in there.
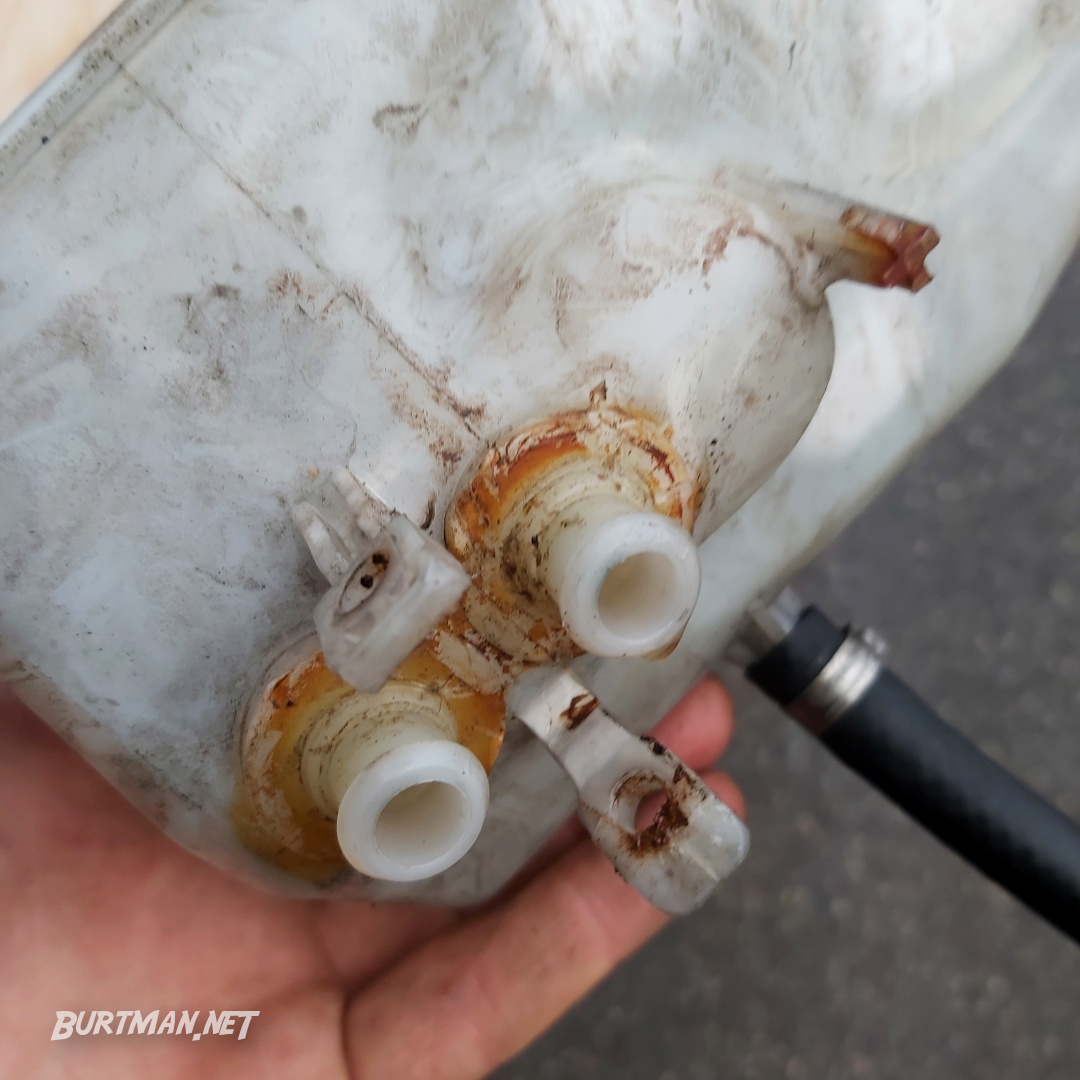
1. Remove the brake fluid reservoir cap and start sucking brake fluid out with your syringe or other siphon, depositing it into the empty container.
2. Once the reservoir is as empty as you can get it, put some old rags or absorbent materials underneath the master cylinder to prevent brake fluid from dripping onto painted metal and engine parts. It'll eat through a lot of that stuff, so you don't want to risk it. Put a bowl beneath the master cylinder to catch the rest of the fluid that will drip at this stage.
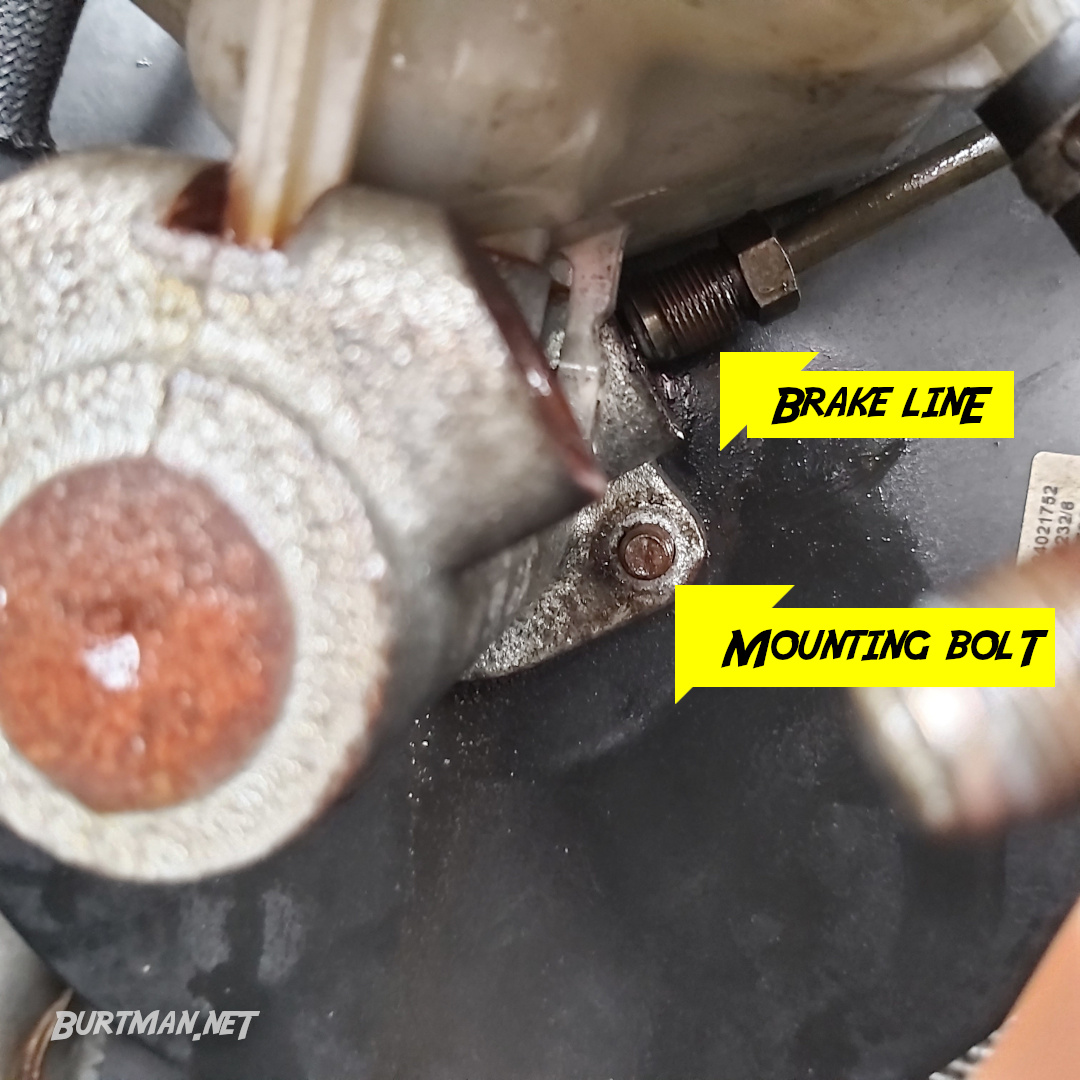
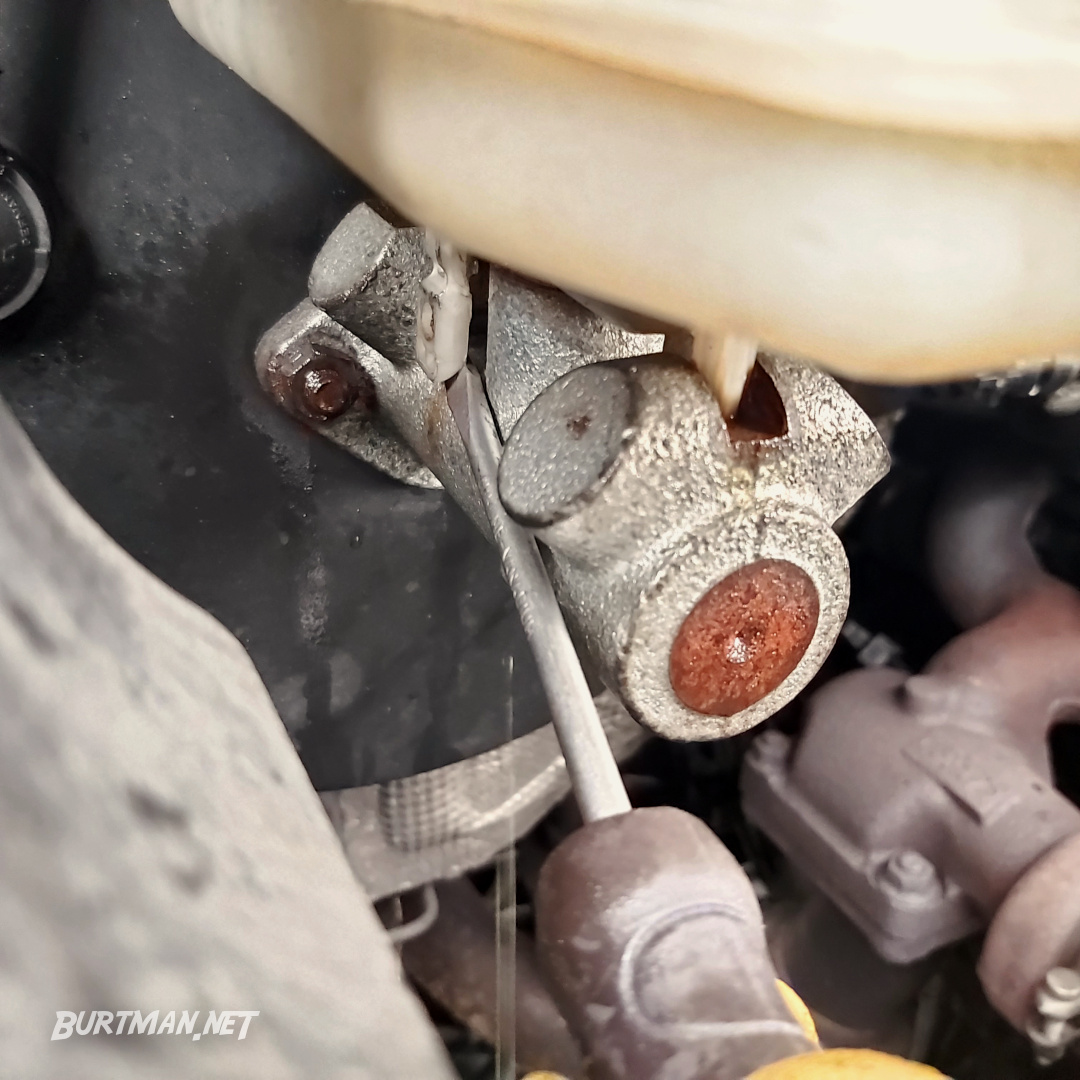
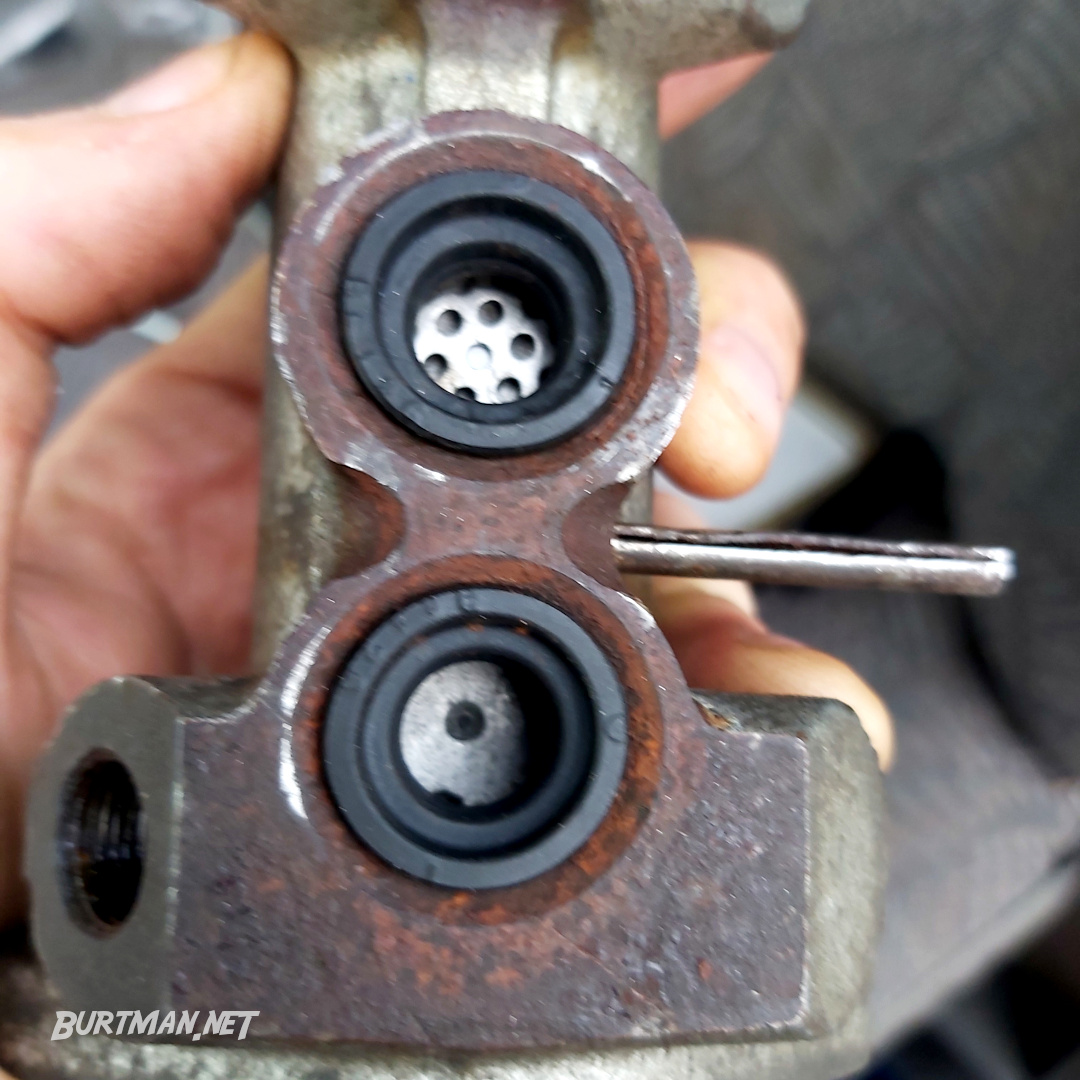
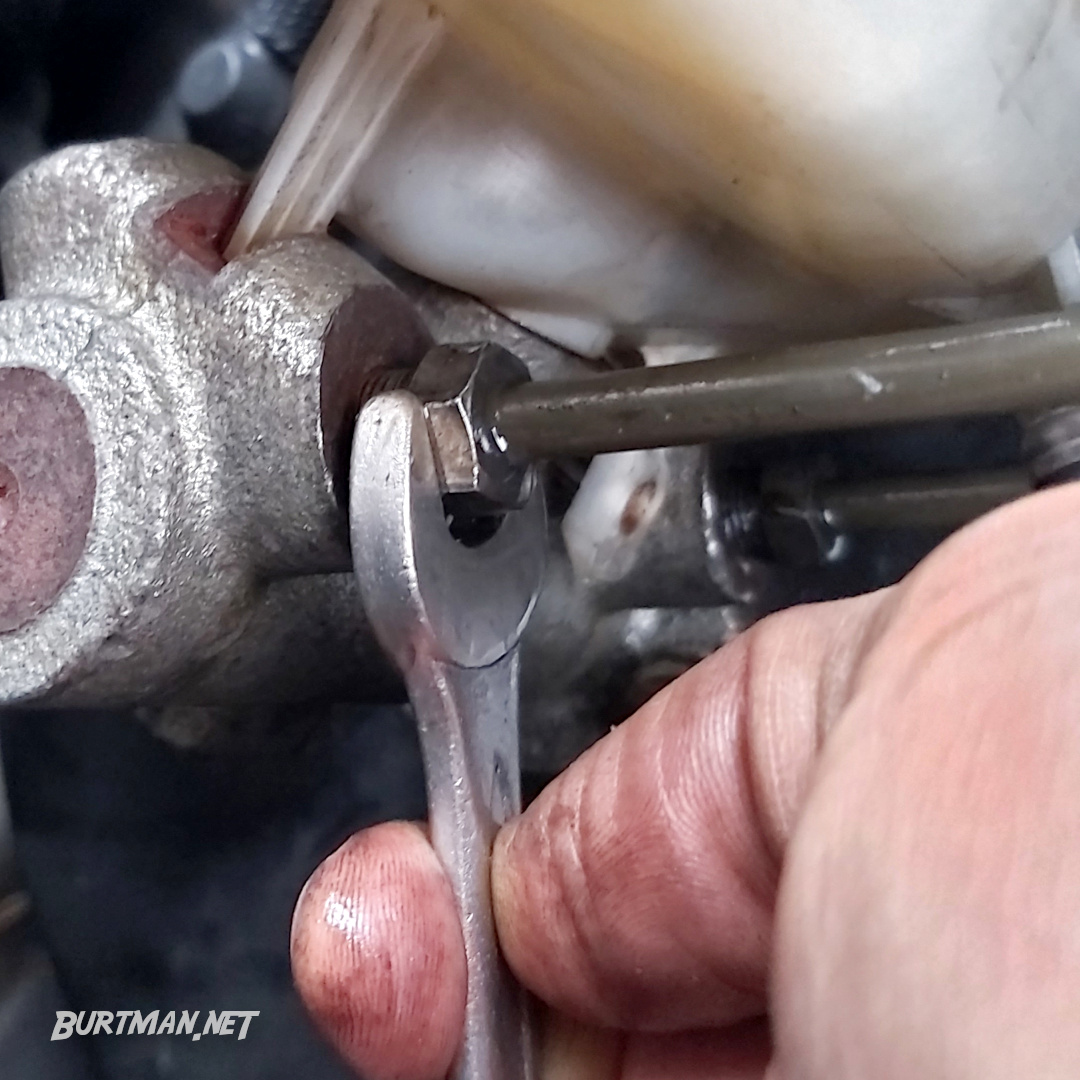
3. Carefully remove the brake lines from the side of the cylinder. They will leak a few more drops of brake fluid and the cylinder itself will start to leak as well.
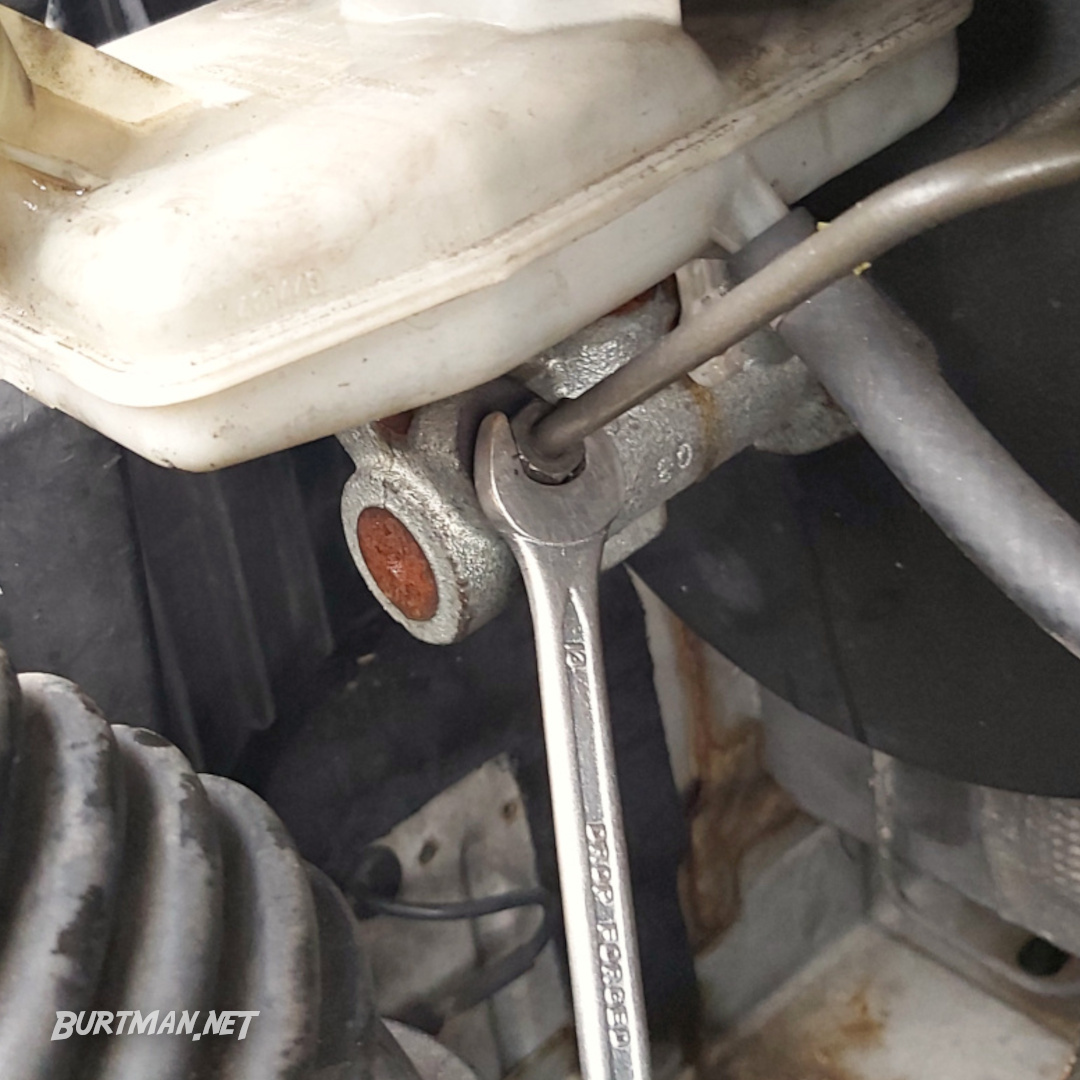
In my case, a 13mm spanner and a little careful force. If you have rust here, be extra careful not to contaminate the brake lines with lubricant or snap them with too much force.
4. Let the lines drip for a minute and catch the fluid in your repurposed dog bowl.

Skip the next step if your clutch has a separate fluid reservoir or is cable operated.
5. Now clamp the clutch master fluid inlet with your small hose clamp and disconnect it by pulling on it, firmly, but carefully. It will leak brake fluid, if you don't clamp it. Just assume everything will leak brake fluid.

Depending on your engine bay layout, you may be able to skip the next step.
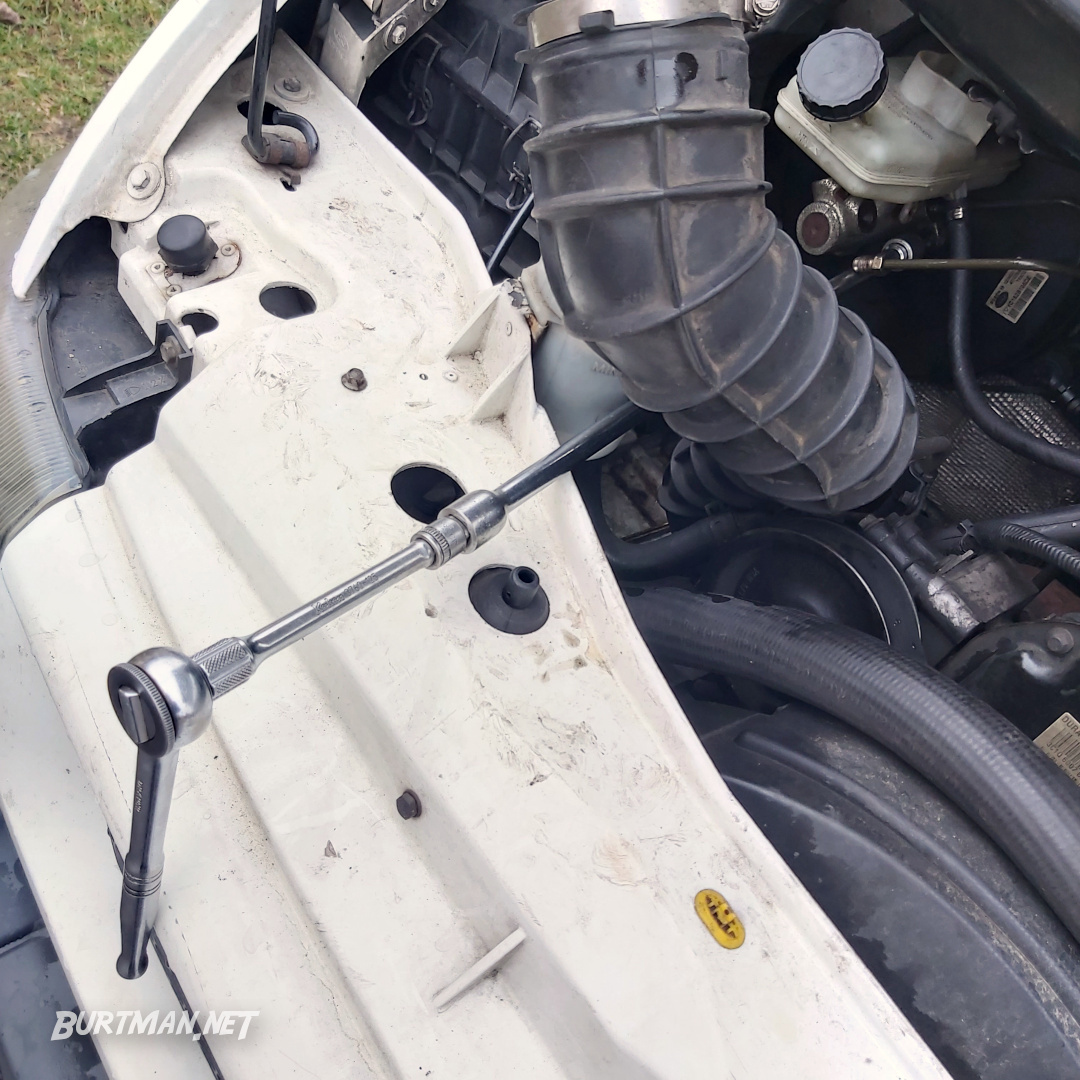
6. Disconnect your air filter feed hose by loosening the jubilee clip about a quarter inch / 6mm and fold it behind the power steering reservoir (or whatever else might be handy in your case). This will give you the room necessary for removing the cylinder mounting nuts.

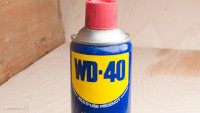
7. Remove the two mounting nuts that attach the master cylinder to the brake booster. If necessary, apply WD40 to the mounting nuts and let them sit for a couple of minutes before continuing. And feel free to get ridiculous with the ratchet extensions for this step. I needed three of them to get to my mounting nuts.
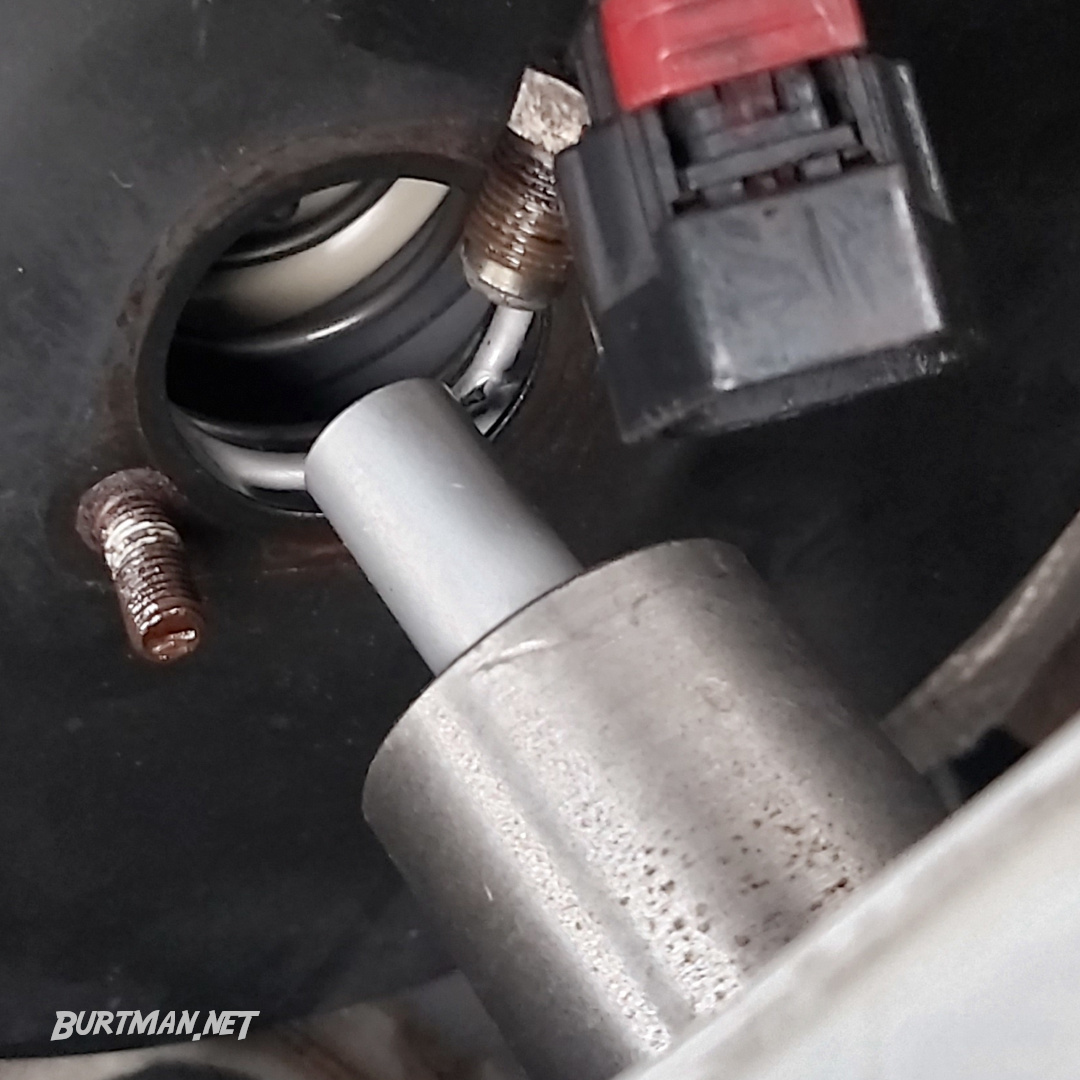
8. With both bolts removed, you can wiggle the cylinder and remove it from the brake booster. Be careful here; there's still a fluid level sensor attached to the top of the reservoir, which you will need to remove next. It's only got a short cable, so don't pull too hard to disconnect the cylinder. I removed the reservoir while the cylinder was still attached, but that was a stupid idea because it is much easier the other way around.
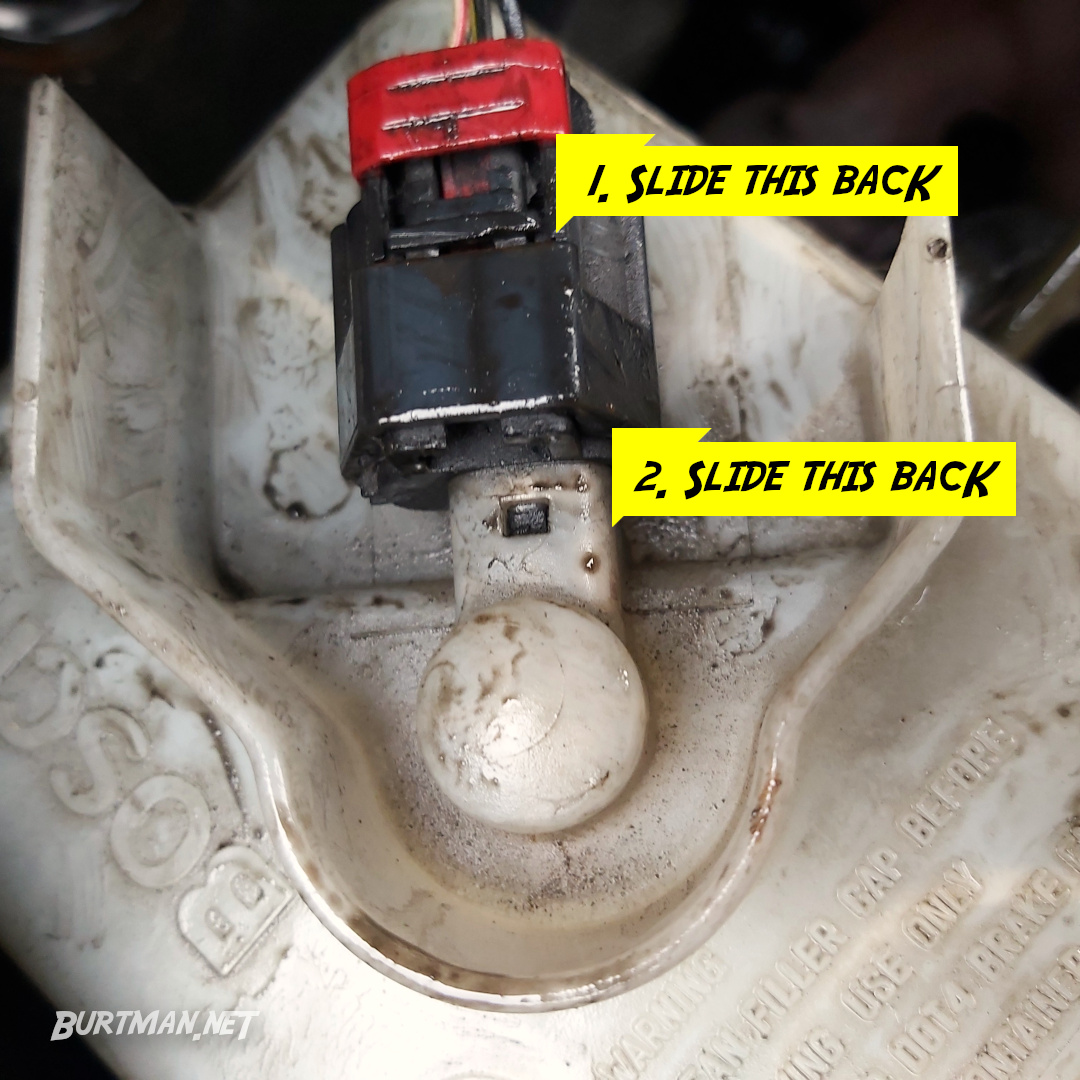
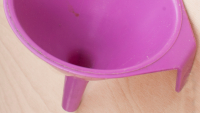
The brake fluid level sensor.
9. Remove the sensor clip by sliding the red retaining clip away from the plug and then push the plug in the same direction. You might be able to pull it, but I needed to use a flat blade screwdriver to carefully pry it free.
10. With everything disconnected, you can now remove the master cylinder unit from the vehicle.
11. Place your funnel into the bottle you poured the brake fluid into and tip the master cylinder upside-down to get rid of a bit more of the remaining fluid. Aiming the exit ports into the funnel, press on the plunger shaft to eject yet more brake fluid from the cylinder. It will come out in a jet, so get as close as you can to the funnel to avoid spillage. Keep the bottle and funnel in place for the next step.
12. Using the flat screwdriver, you can now (carefully - it's only plastic) pry the reservoir from the top of the cylinder.
Again, I did this while the cylinder was still in place. Careful with these side clips. They are easy to break.
The two pipes that connect the reservoir to the cylinder are flared, so they will be quite difficult to remove. That's going to require some patience. Keep checking the side clips as you wiggle the reservoir from side to side; they easily reattach themselves, hindering your efforts.
It's much harder than it looks. Be careful with it and don't let the kids hear the things you say while trying to remove it.
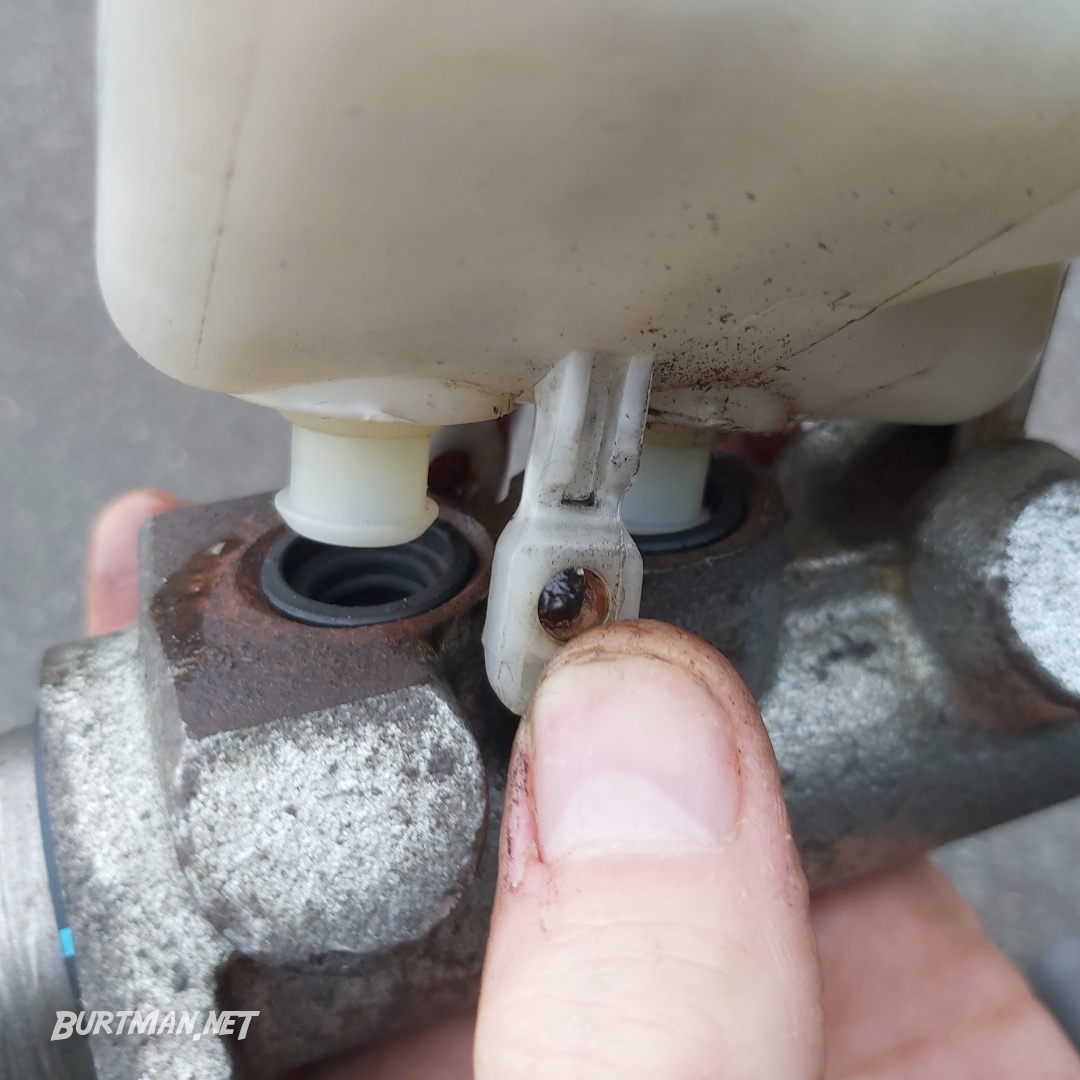
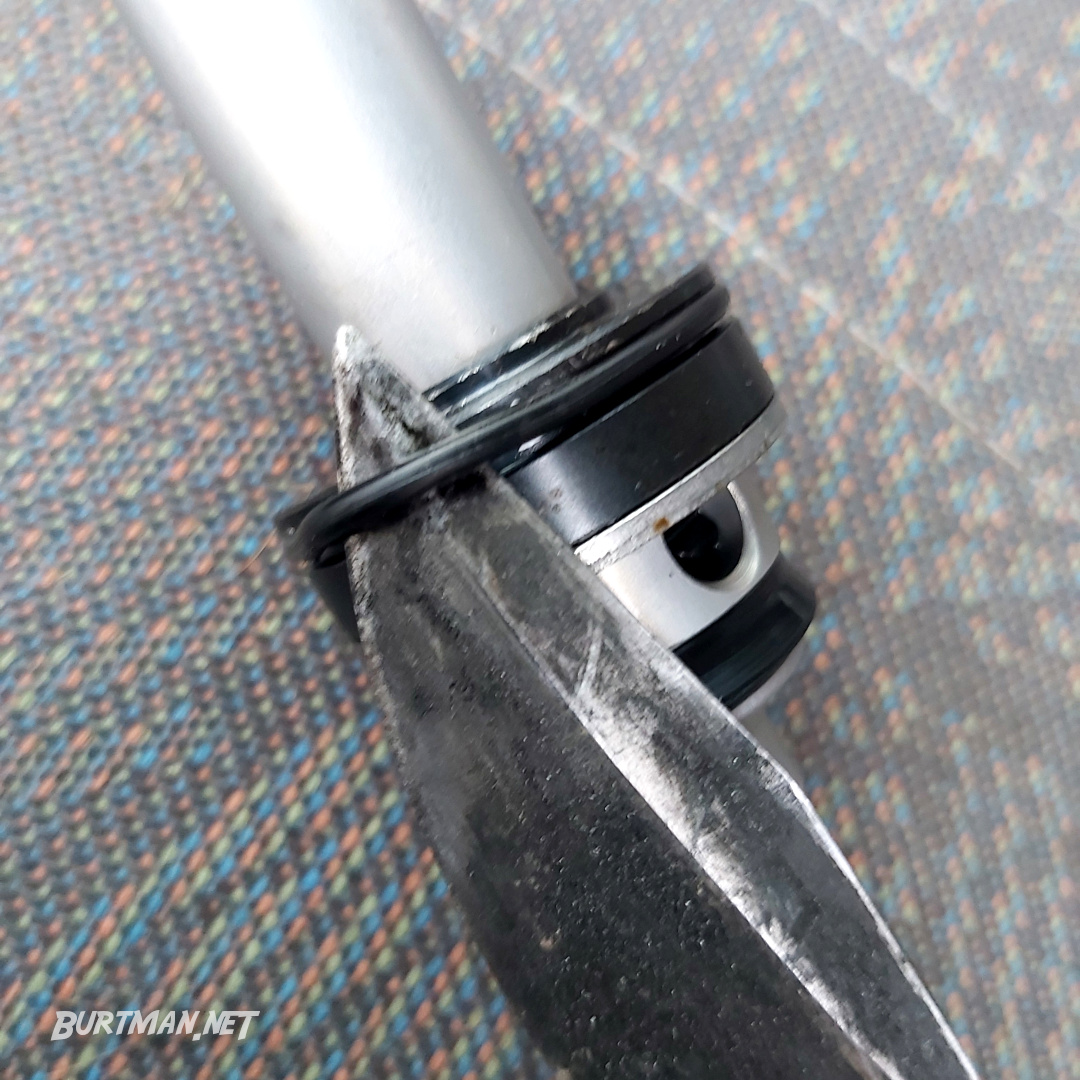
With the reservoir removed, you can see the first two seals that will need replacement. There will now be more brake fluid that needs to be drained into the bottle.
The reservoir seals for the primary and secondary brake circuits. I removed the pin that holds the reservoir in place, but it wasn't necessary. Don't do that.
Taking It Apart
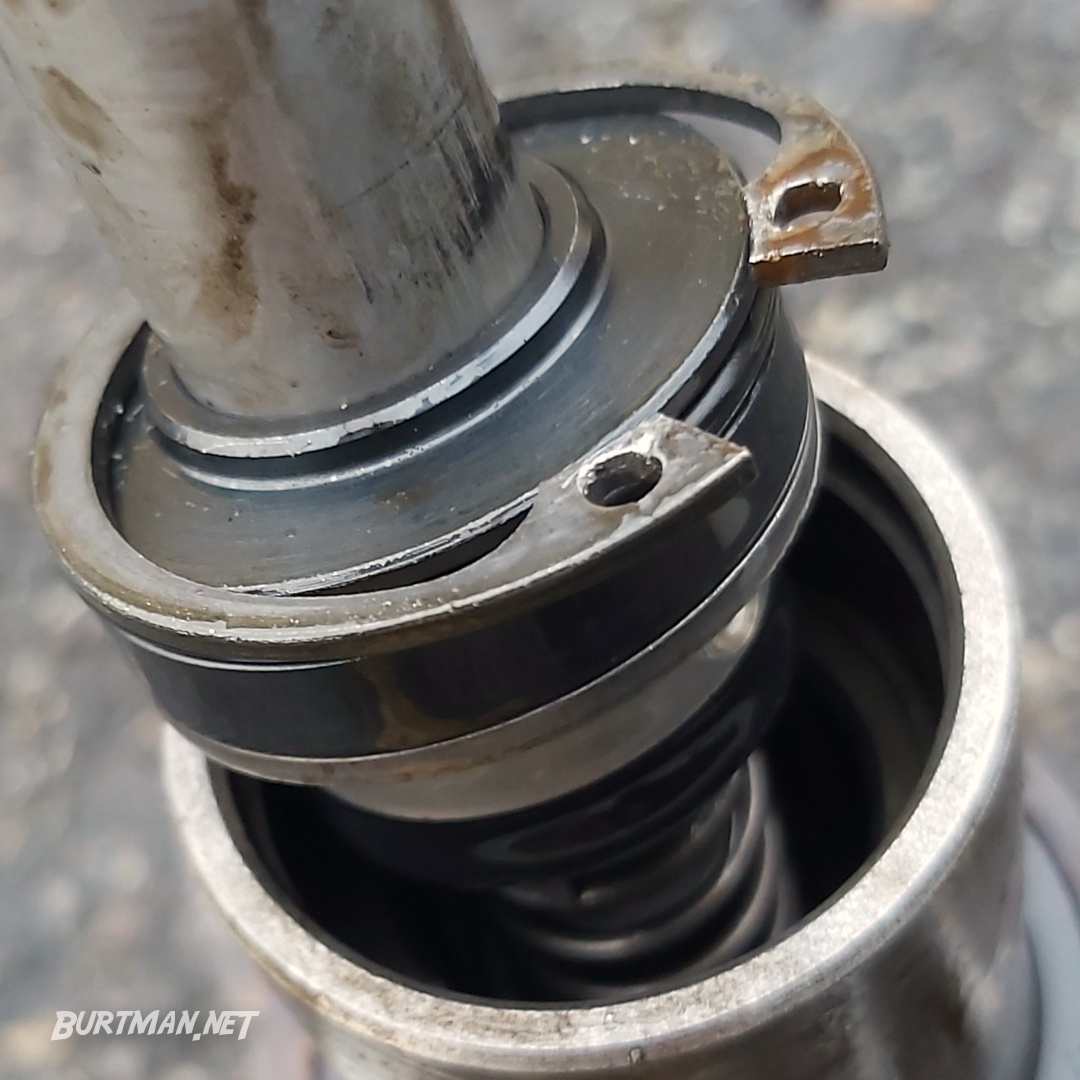
The master cylinder is fairly simple and the only thing holding the primary plunger in position is the circlip.
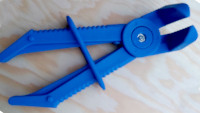
13. Use your circlip pliers to remove that and expect the clip and most of the internal assembly to fly off into the distance, due to spring tension. Plan for that before removing the clip.

The circlip in question.
Having planned for the spring explosion, you should see something like this.

With the primary plunger removed, the plunger spring is visible.
At all points below, expect more brake fluid and drain as needed.
14. To get to the secondary plunger, you'll need to remove the pin that holds it in position. The easiest way is to slap the whole unit onto the rubber floor of the van until the pin starts to move. You may need to press on the back of the plunger just slightly to relieve pressure on the pin in order to do this.

The secondary plunger retaining pin.
You can pull this out by hand, once there is enough of it to grip. Avoid using pliers, as you could mark it, making it difficult to re-seat later on.

The secondary plunger will also need a bash or two on the rubber floor.

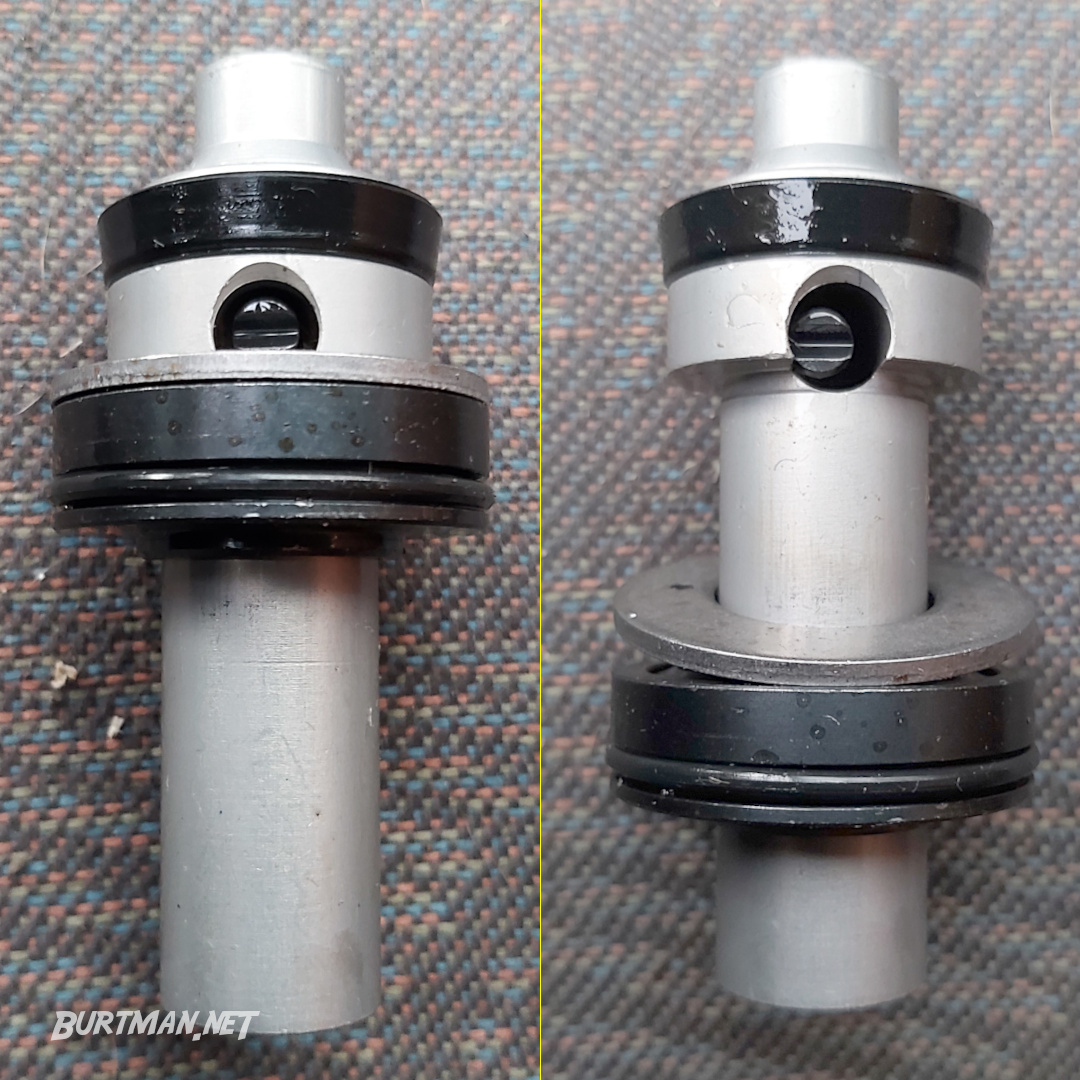
The whole assembly.
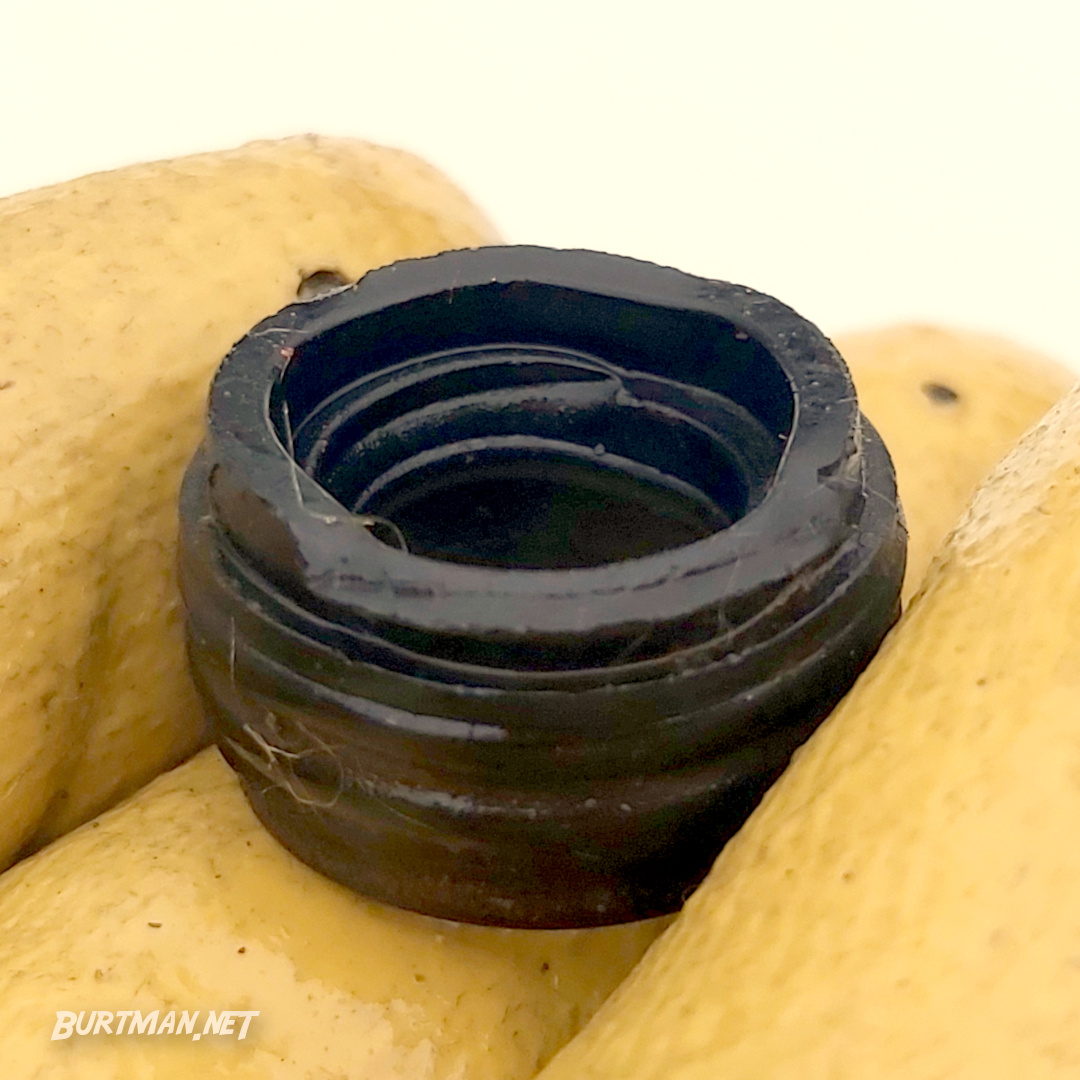
The seals that need to be replaced are labeled here. Part 7 is a crap filter of questionable use, but if it's there, don't lose it.
The black washer slides off the plunger shaft and the external plunger seal can be pried out with the dolphin nosed pliers.
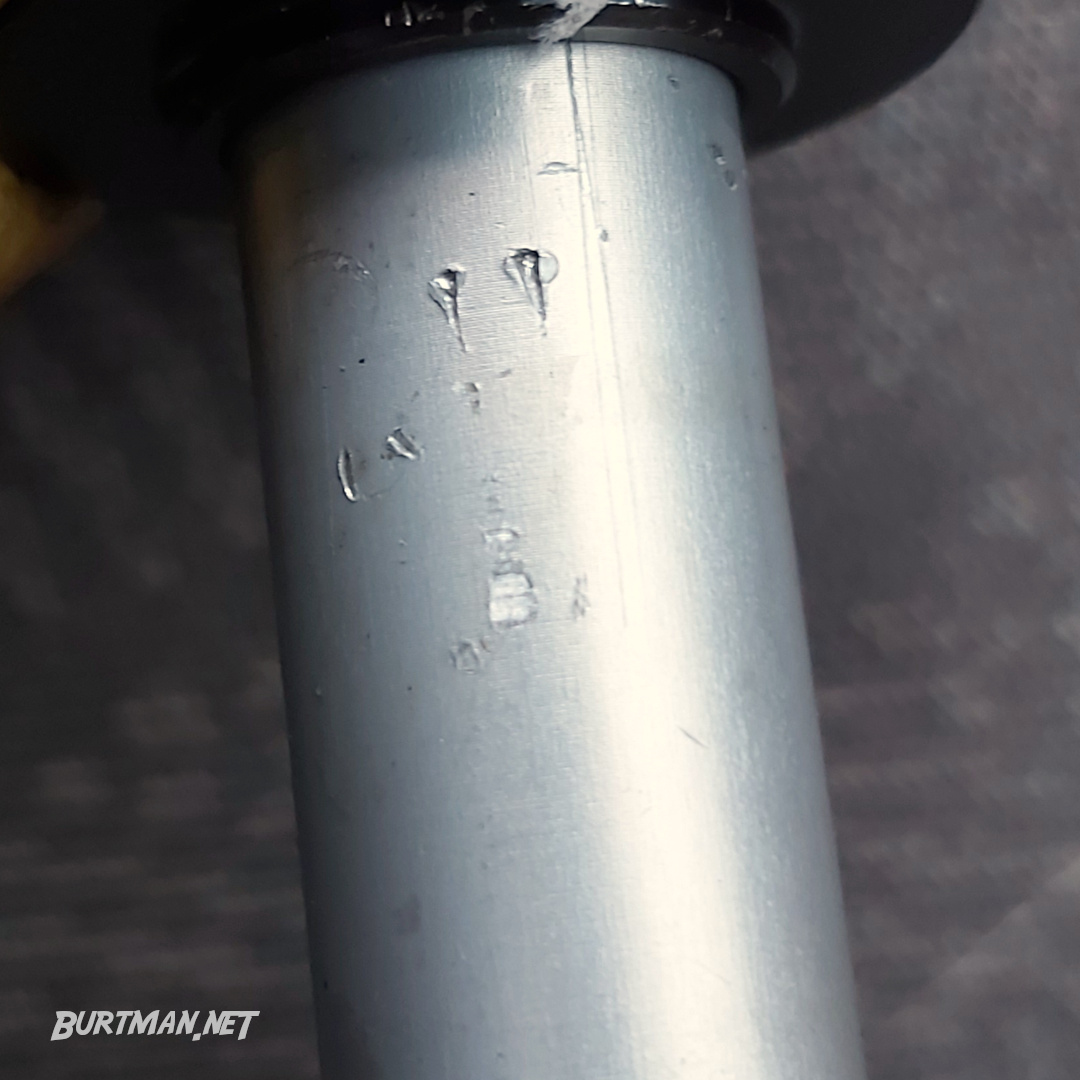
Be extra careful not to mark the surfaces of these internal parts. The soft metal can easily be damaged by pliers and prying tools. Such damage may appear to be unimportant, but it will let air into the system and cut rubber seals very quickly. This plunger needs replacement because it was scratched with pliers.
With the black washer removed, you will find another seal that also needs to be replaced.

External plunger seal.
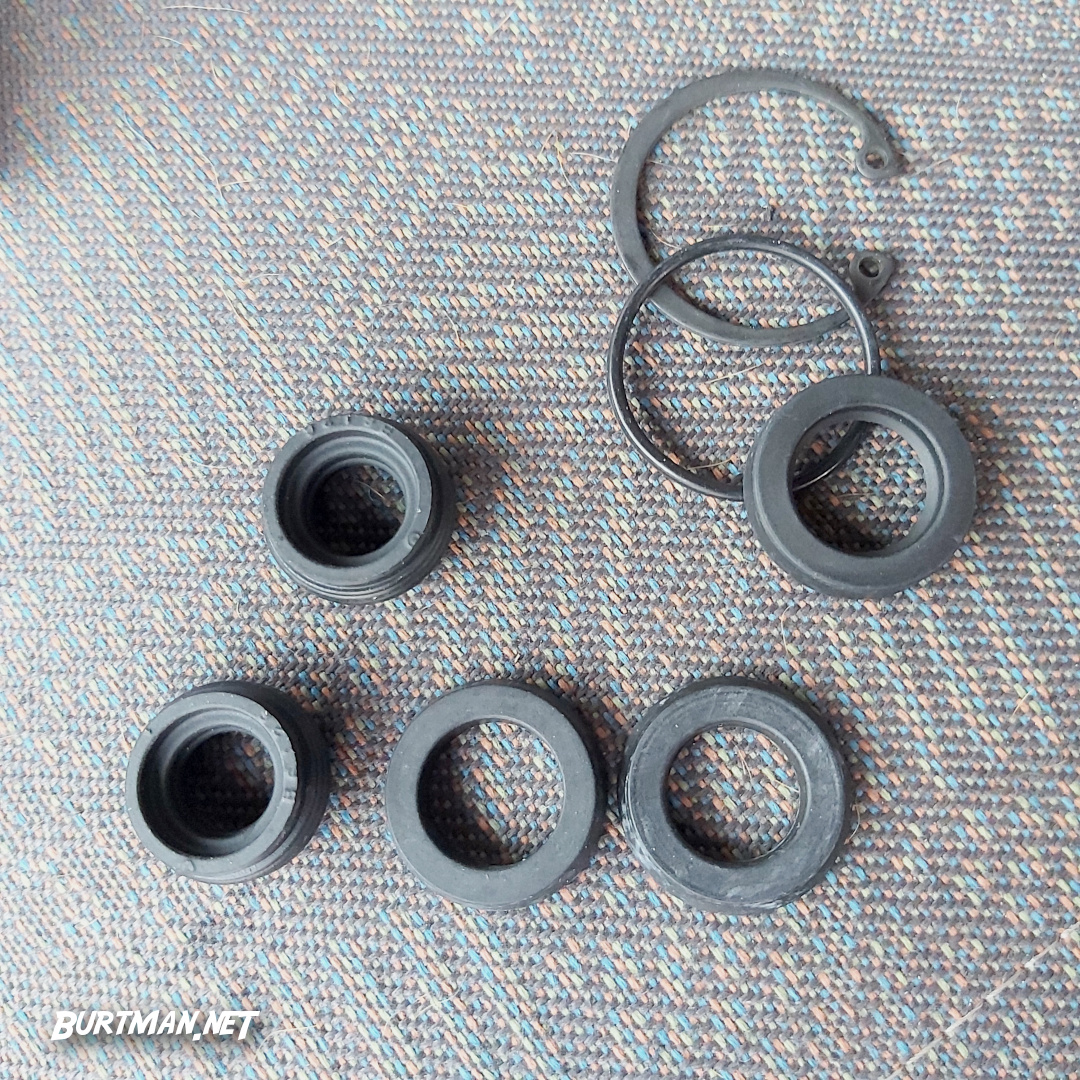
A new seal kit consists of plunger seals, reservoir seals, main washer seal, unit seal and circlip. The new washers cost about €3.
15. Now set about carefully matching the new seals to the old ones and take a photo before you remove any seal, so you don't forget which way round it was seated.
Some seals can be removed with a knife. Others will require dolphin nosed pliers. Avoid cutting them off, as sharp edges should be kept away from these precision parts.
Here, you can see the deformed seal that was letting air into my system.
16. Once all the seals have been replaced, wipe a drop of new brake fluid around each one to prevent them from sticking as they are reinstalled. Make sure to install them in the opposite order from how you removed them, and pay attention not to let any of them flip inside-out as they go into the cylinder. Also, make sure that the bottoms of the reservoir seals are sitting flush with the metal inside the ports. Any puckering or gaps will undermine the seal.
17. Replace the secondary plunger retaining pin and press it down, firmly, until it stops. It should protrude only 1-2mm. Any more, and it's not properly seated. In that case, press down on the back of the secondary plunger, to relieve pressure, and try again.
18. Refit the primary plunger and spring carefully, then place the black washer over the top and press on it firmly to re-seat it. The spring tension inside the cylinder will make it quite tricky to replace the circlip, so I suggest pressing down on the plunger shaft a little bit and threading the circlip in at one end. You can hold that end in place with the circlip pliers as you squeeze the other end into place. It should snap very definitely into position and the outer edge should be obscured by the cylinder body. Make sure it's even and firm before continuing. You should be able to pump the plunger without any sideways movement.
19. Before refitting the reservoir, give it a clean, especially around the pipes. That's where the seals will sit, so we want that area as smooth as possible.

20. Now refit the reservoir by pressing it firmly onto the cylinder. Make sure you have it the right way round before you start, because you remember how much fun it was to remove it, last time.

The reservoir should sit flush and wobble only very slightly in relation to the cylinder.
21. Carefully place the cylinder back onto the mounting bolts and tighten the nuts by hand until they stop. Then, use your torque wrench to tighten them evenly, little by little, until you reach to correct tightness.
This should all be very easy.
22. Reconnect the sensor by pushing the plugs firmly together, then sliding the red part towards the connection.

23. Making sure there is plenty of rag covering most of your engine bay, you can now put some brake fluid into the reservoir and have your glamorous assistant slowly press and release the brake pedal until the brake fluid starts to come through the cylinder and drip into the catch bowl you placed earlier.
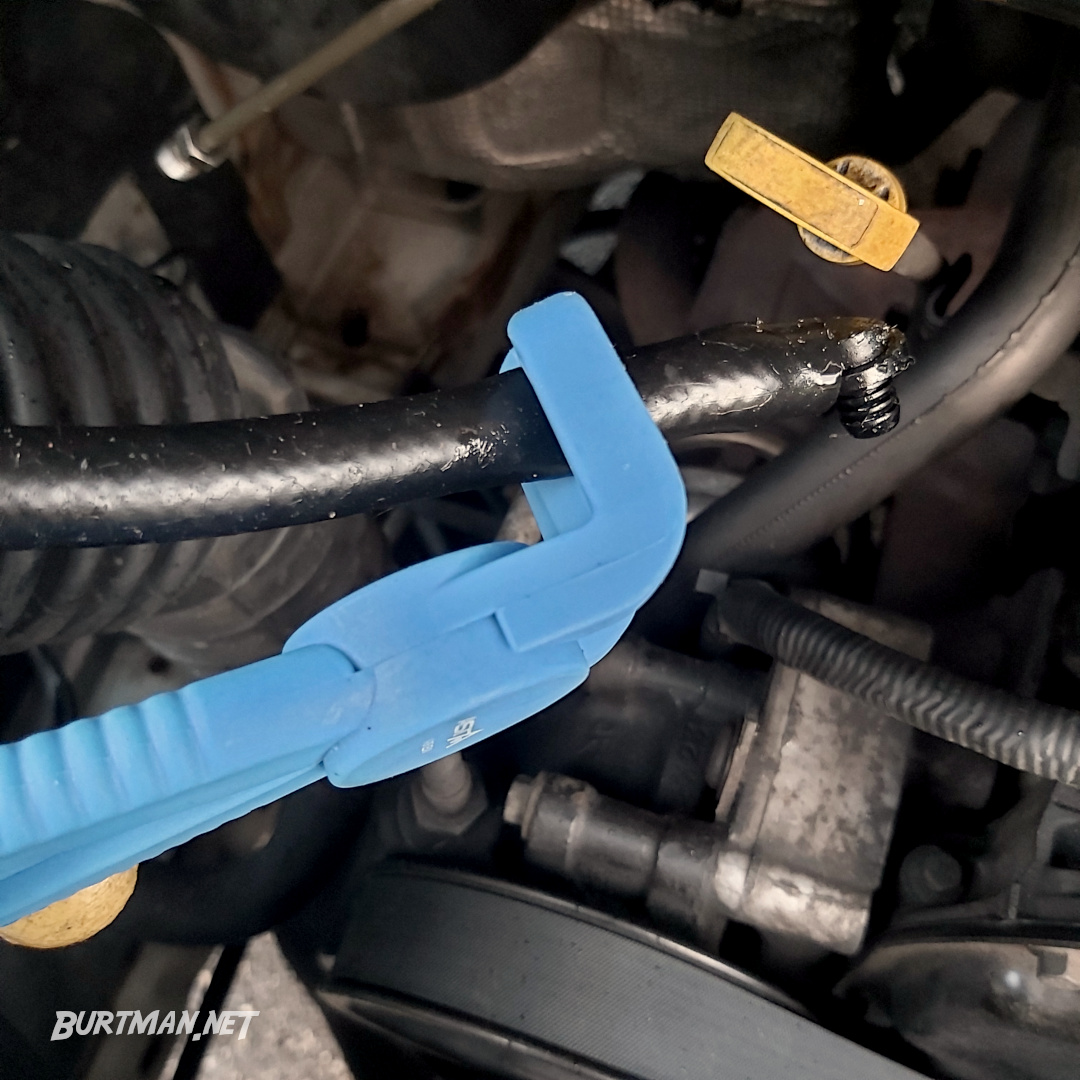
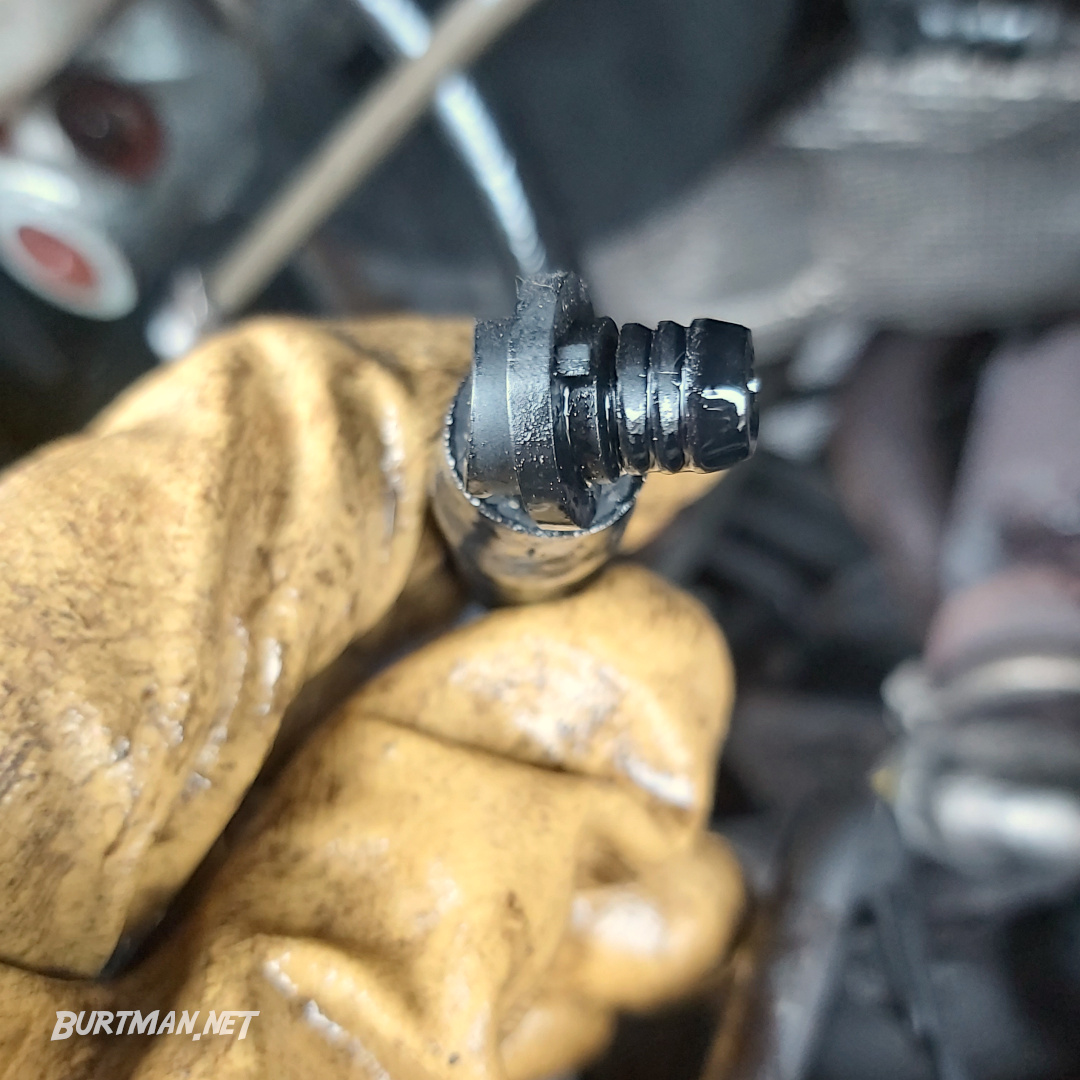
24. Once brake fluid is coming out of both brake line ports (or all four, if you have four), have your assistant keep the pedal pressed down while you reconnect the brake lines, taking extreme care not to cross-thread them (not worth it).
Tighten slowly and don't use more force than you need to. When the lines are sufficiently tight, you may still see a few threads. This is fine, as long as the line is tight (and not over-tightened).
Skip the next step if your clutch has a separate fluid reservoir or is cable operated.
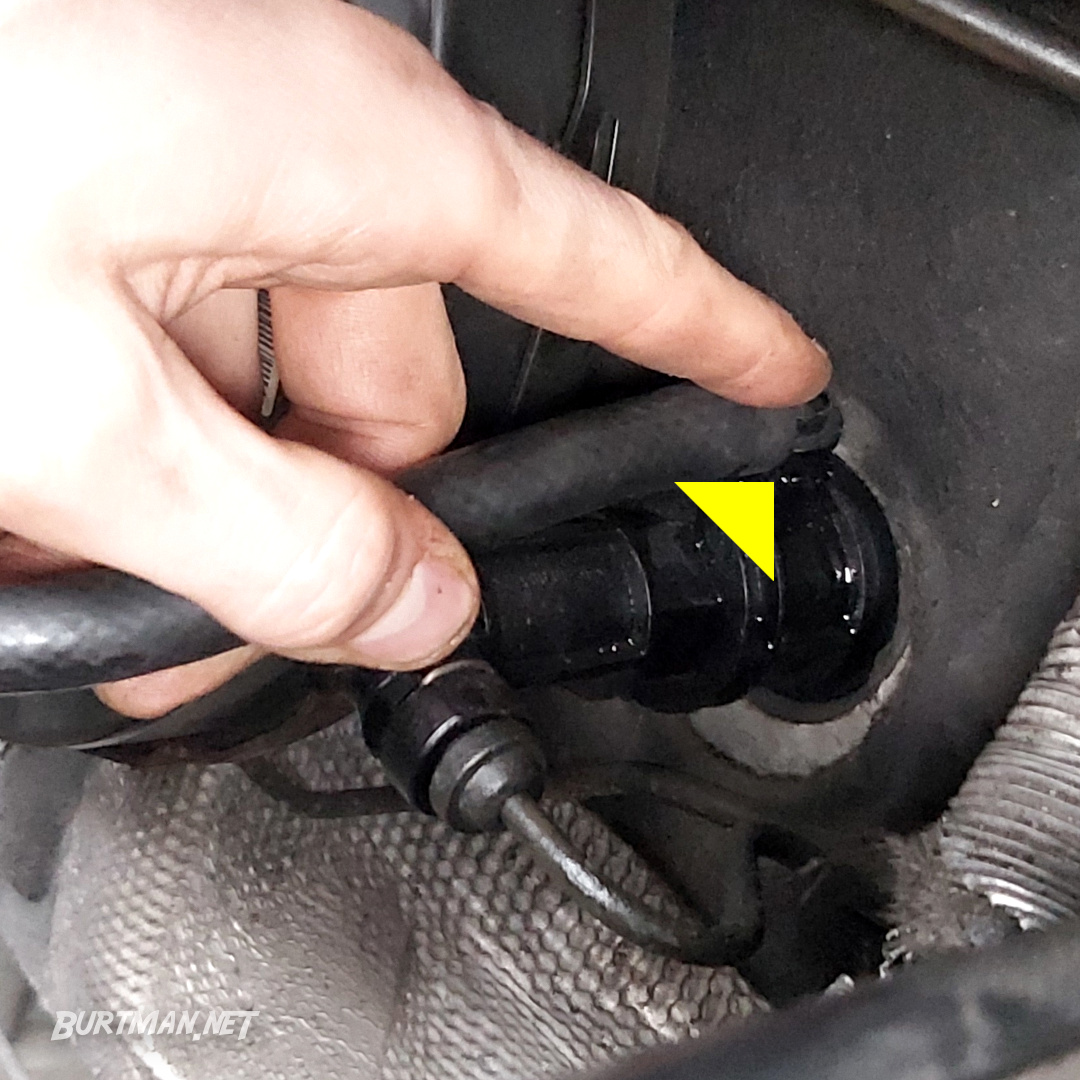
25. Reconnect the clutch master cylinder fluid feed by pressing it firmly into the receiving port. It should click three or four times as you press it and look flush once it's done. There should be minimal play, once fitted. Now remove the hose clamp to let the fluid flow.
26. If you disconnected the air filter feed hose, push it back on and tighten the jubilee clip until the hose can't be removed by hand. You don't need to tighten it any more than that.
When you're happy that everything is connected, the brake fluid is at maximum, and you've got no leaks anywhere, you can proceed to the follow-on jobs:
1. You will need to bleed the brakes. There could easily be air at the top of the line, and that all needs to be worked through to the bottom and bled out, so do it thoroughly and take your time.
2. You may need to bleed the hydraulic clutch.
3. You may need to bleed the ABS module.
Sign In To Leave A Comment
There are no comments marked as public for this item.
Stay Up To Date
