
Installing The Battery
 Power & Water
 For Everyone
Updated:
Your short battery cables will probably be much thicker than the corresponding cable inputs on the CC, so you will need to connect them securely to thinner cables (rated to at least 30A) in order to connect them safely. You don't want any stray wires poking out anywhere, as exposed wire can cause dangerous short-circuits that can lead to fire.
Seat your battery safely, so it doesn't move around and so that no metal can come into contact with its terminals unexpectedly (like a seat belt clasp, for example). Ideally, place the battery as closely as possible to the charge controller and make sure that both of the short battery charging cables are the same length. The POSITIVE (red) cable should have the inline fuse attached.

In case you were wondering what might happen if something shorts across your battery.
Attach the NEGATIVE (black) battery cable to the input of the 30A breaker and connect the output of the breaker to the input on the CC. You will be using this breaker to open and close this side of the circuit whenever you want to isolate the battery, so it is safer to disconnect the NEGATIVE side. In most cases, the CC will power on automatically as soon as the battery is connected.
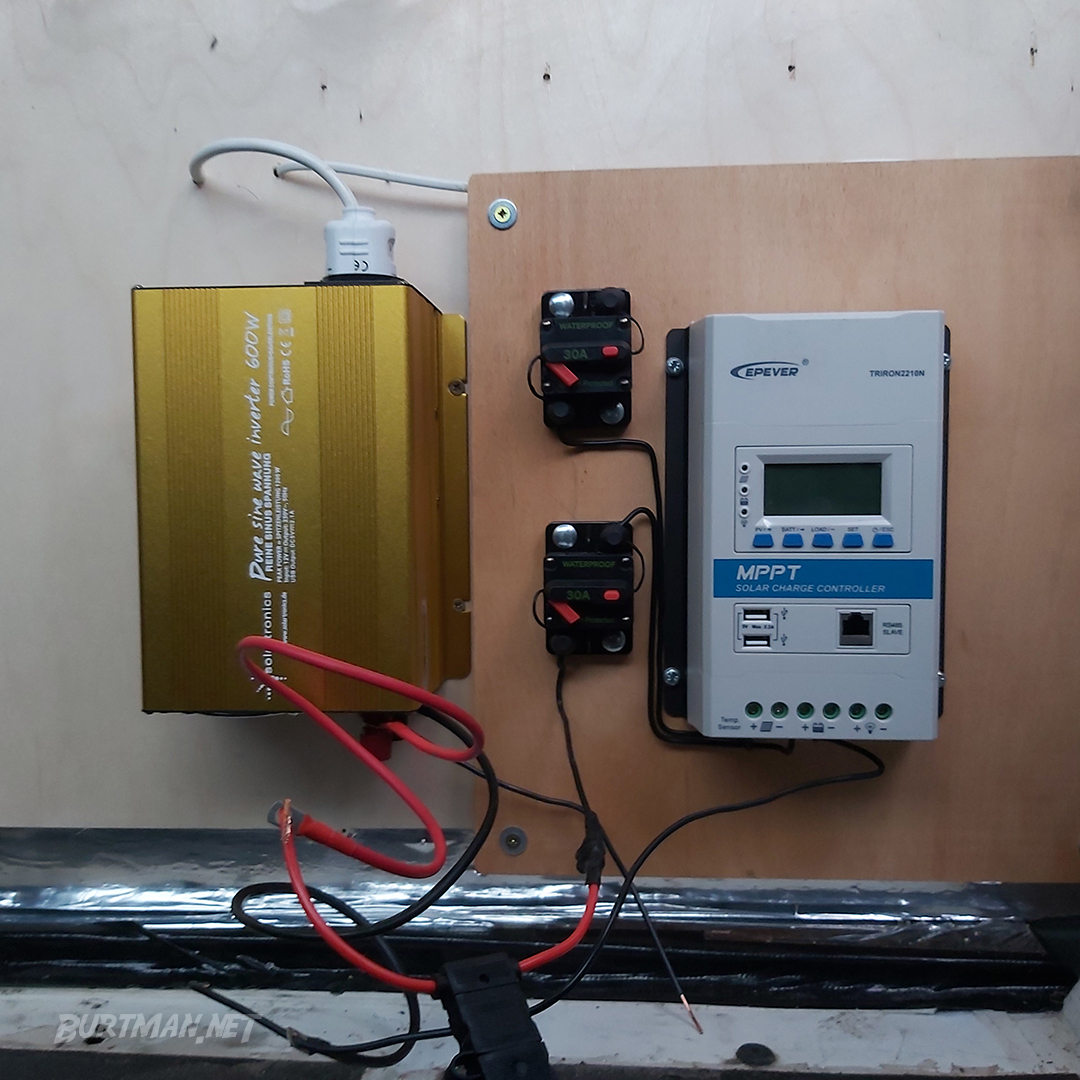
Breakers in the open position, preventing power from flowing.