
Connections
 Power & Water
 For Everyone
Updated:
Before continuing with this step, check if you have a lot of excess cable. Assuming the power cable is in its permanent position (resting in all interior valleys and brackets), you might want to cut the cables at this point. If they are not significantly longer than they need to be, just leave them alone and continue. An extra half meter of cable is not going to produce any meaningful losses in your circuit and shouldn't be too hard to tuck away neatly.
Now, with the [modified] battery cables screwed firmly (but not insanely so) into the CC inputs via the bottom breaker (2), and the correct battery setup applied in the CC (don't forget to SAVE the setup), you can connect the last few cables.
In this image, the breakers are in the closed position, because it was actually taken after the installation was complete, but at this stage, you need to make sure both breakers are in the open position before you start, so no power can flow. You can't get electrocuted if there's no juice!
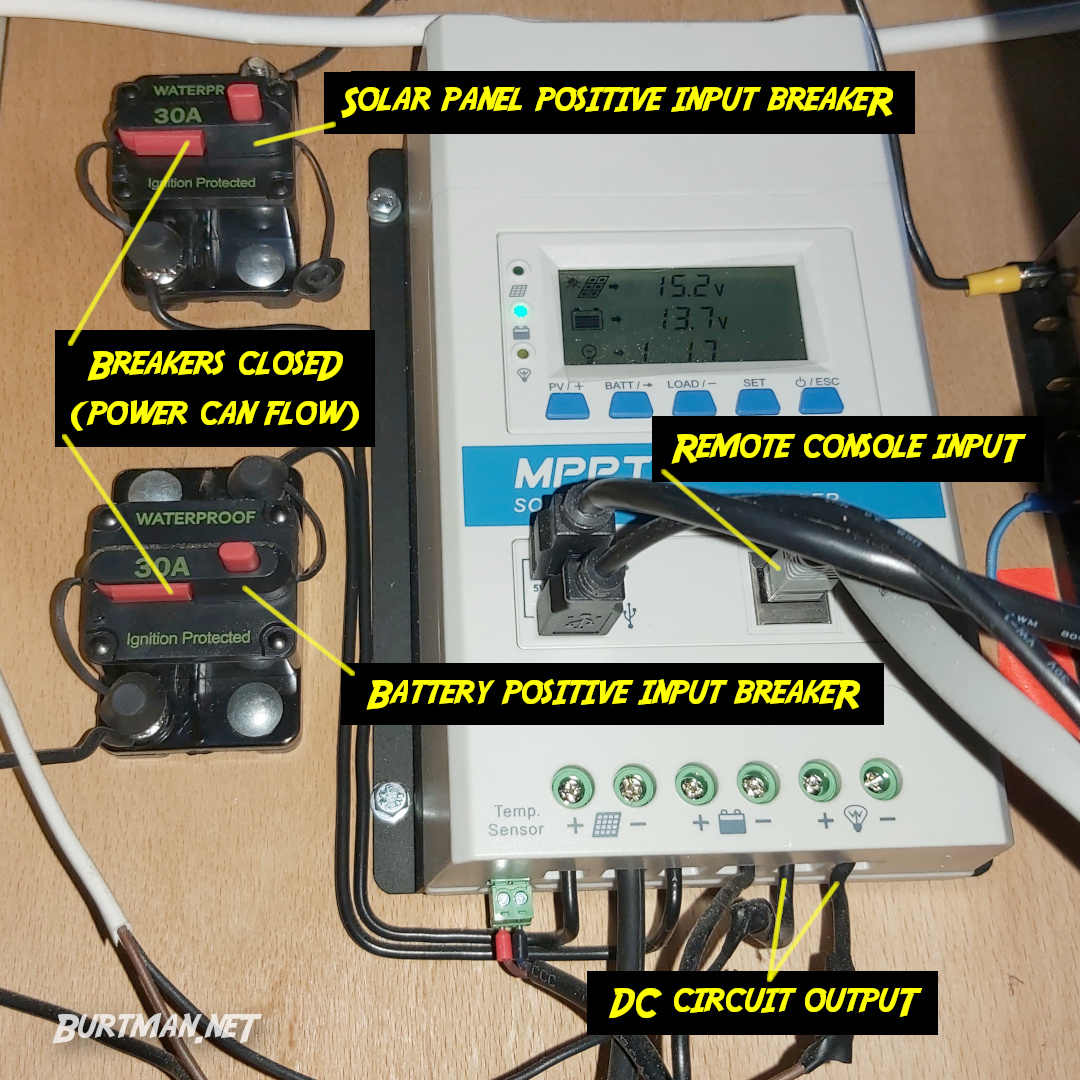
Charge controller inputs and outputs with breakers installed.
Those stray cables you can see are as-yet unused, but will be safely out of the way once connected.
Although the breaker cables look thin, they are sufficiently-rated solid copper cores.
You can put the breaker on the positive or negative line.
Solar power inputs are connected to breaker 1, so power coming in can be disconnected.
Battery power inputs are connected to breaker 2, so power can be isolated from the system.
Use short cables rated to at least 30A for both.