
Oops, I Drilled In The Wrong Place...
 For When Things Go Wrong (And They Will)
 Read around 2,900 times
 For Everyone
Updated:
So you made a hole in the wrong place in your roof. I specifically told you not to do that, did I not?
Well, fret, not! There is a fix for that, although it's not as good as exercising a bit of care beforehand. Just sayin'.
Obviously, for the sake of a complete guide, I have deliberately made the same mistake on my own build, and can now show you a good way to fix it.
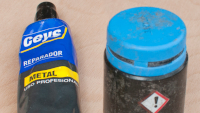
First, make sure that it's not going to rain soon. If you're in the UK, let's just assume that it is. Cover the hole. Since you have cut through the metal, the paint is no longer protecting it from moisture, so let's just make sure it doesn't get wet or let water into your van while you're out fetching some of this stuff:

Also pick up a can of spray paint in as close a color as you can find to your van's paint, and make sure it's designed for metal. That's going to be important after the repair.
Mix And Apply
Before using this product, just sand the hole a bit to make sure it's flat and there are no sharp pieces of metal sticking out. Then follow the instructions on the packet to create a liquid metal that you can apply to the hole. This is a pretty simple product to use, but what it might not say on the tube is that the time it takes to dry can be as little as 2 minutes, depending on the mixture you created, so you want to be ready to apply it as soon as you are done mixing.
If you just made a small hole, you can just dab some of this stuff in and leave it to dry. If you made a bigger hole, you will need to dab this stuff around the edge, let it dry, then put some more on and let that dry, so the hole will slowly get smaller, until it is sealed. Either way, being on the roof, the liquid will droop, so you will need to add a second layer on top of the first one, once the first is completely dry, in order to restore the flatness of the roof.
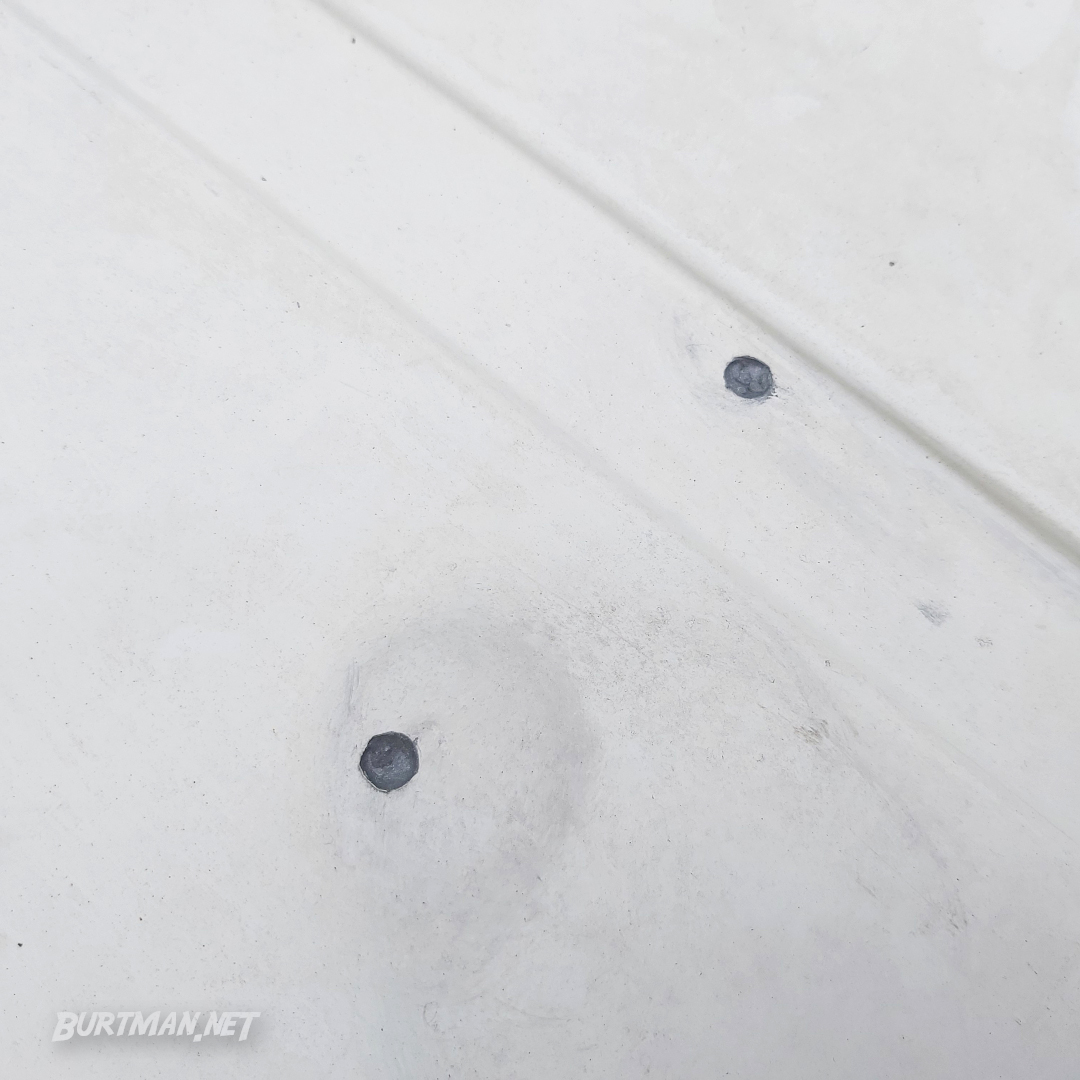
When all the liquid metal is dry, you'll want to wipe it clean, dry it, and spray some more paint on it, to make sure it doesn't get a chance to get wet.
Since you're curious...
I initially wanted to place two panels on my roof. The only way they would both fit was by mounting them sideways. After a few sips of tea and a square of chocolate, I drilled the first hole. But after I went down to ground level to fetch another snack, I realized the panel was sticking out a bit more than I liked from the sides of the roof. It was only an inch or so, but I was thinking about drunks and the kinds of people you sometimes find in cities, who think it extremely amusing to ruin things for other people. It was just too tempting. Even I wanted to hang off it to see if it could take my weight.
So I decided to remove and refit in the linear position, which would take up too much space to allow a second panel, but, in my opinion, as it made the panel invisible from the ground, this was a sacrifice worth making. Think about that when you're fitting yours.