
Lifting Your Van
 General Safety
 For Everyone
Updated:
Many different jobs require you to lift your van with a jack. This guide is here to show you how to do that safely with a variety of different jack types. Due to the dangers of lifting vehicles, it is extremely important to pay close attention to every step of this guide, otherwise you may have a very nasty accident. That said, done properly, lifting is usually very safe.
Firstly, let's look at the different jack types you are likely to encounter. While some vehicles are equipped with specially designed jacks, such as you might see on off-road vehicles, the instructions for their use will be specific to those vehicles, and if you have such a setup, you should check the manual that came with it and watch a few videos online to make sure you know exactly how to operate those jacks.
First Things First
Regardless of the jack you have available, you will need to know where your jacking points are. These are strengthened parts of the underside of the vehicle that have been designated specifically for lifting. If you jack anywhere other than a jacking point, you risk serious injury and significant damage to the vehicle.
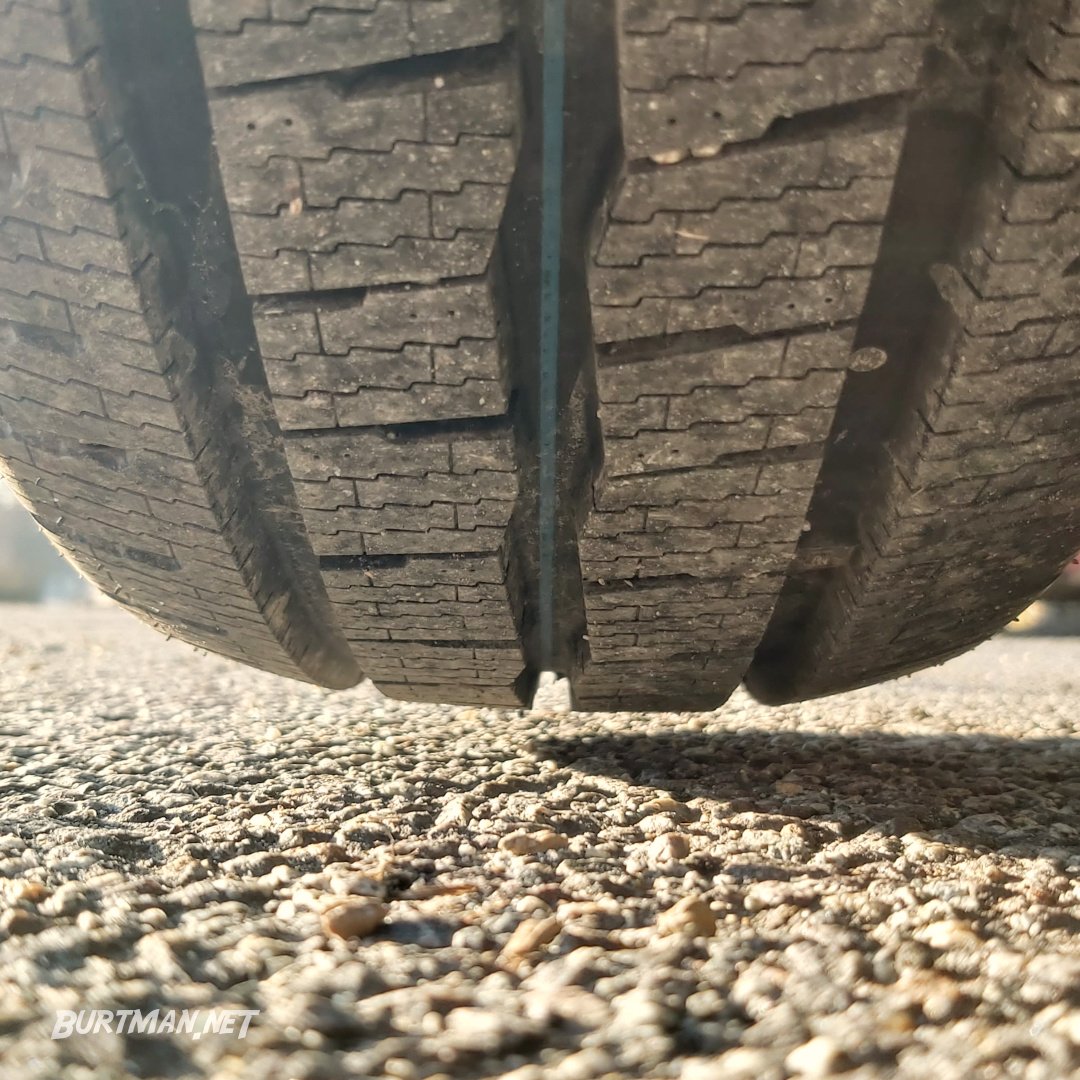
The under-sill near the wheel arch is the most common jacking point at the front and back of most vehicles. The steel directly above this section is thickened and extremely rigid. While it may not appear strong enough to lift the vehicle, only corrosion and damage will make this area unsafe for jacking. Inspect the area before use.
If your jack has a grooved head option, use it here to prevent the jack slipping out from under the sill during lifting.
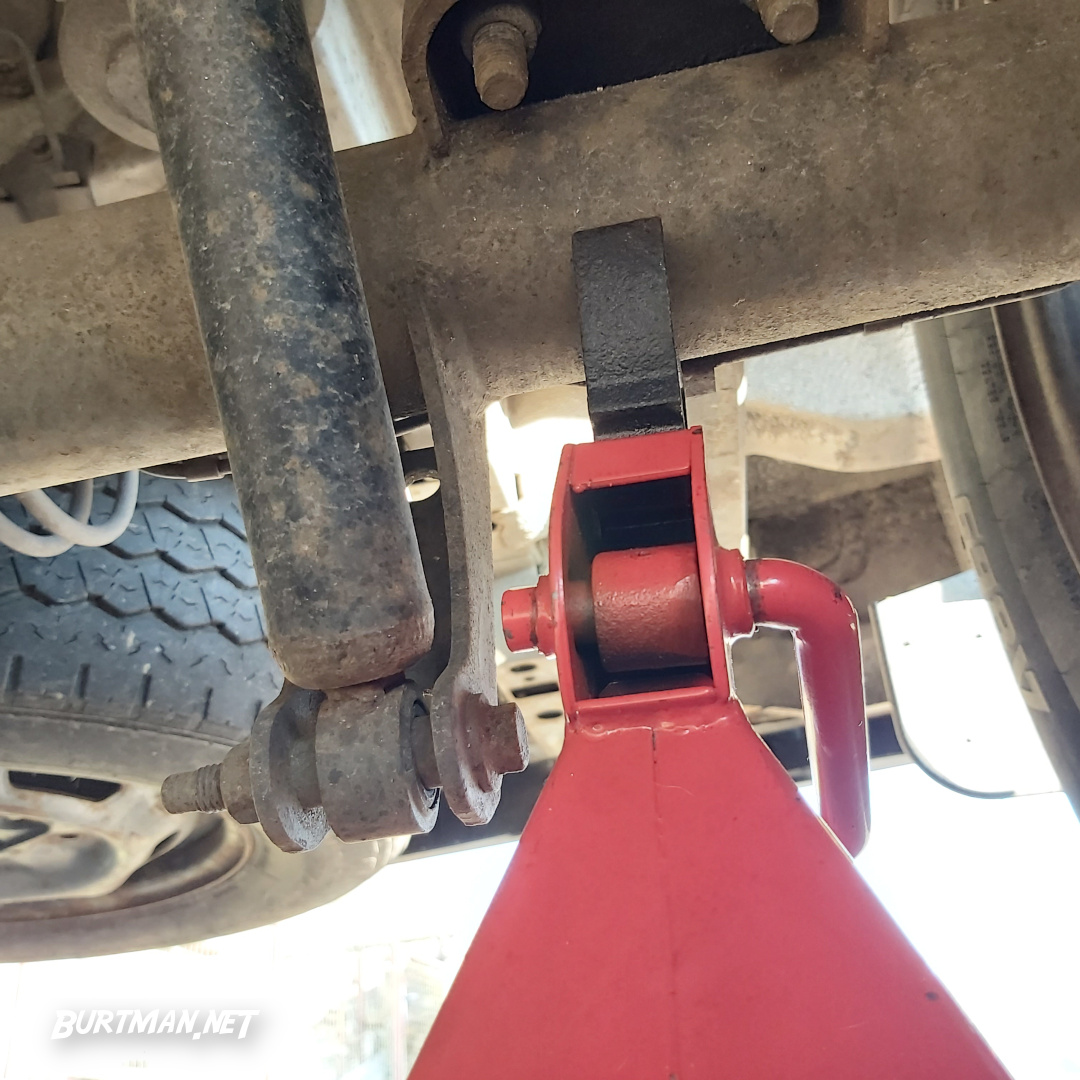
The axle or wishbone is another strong jacking point.
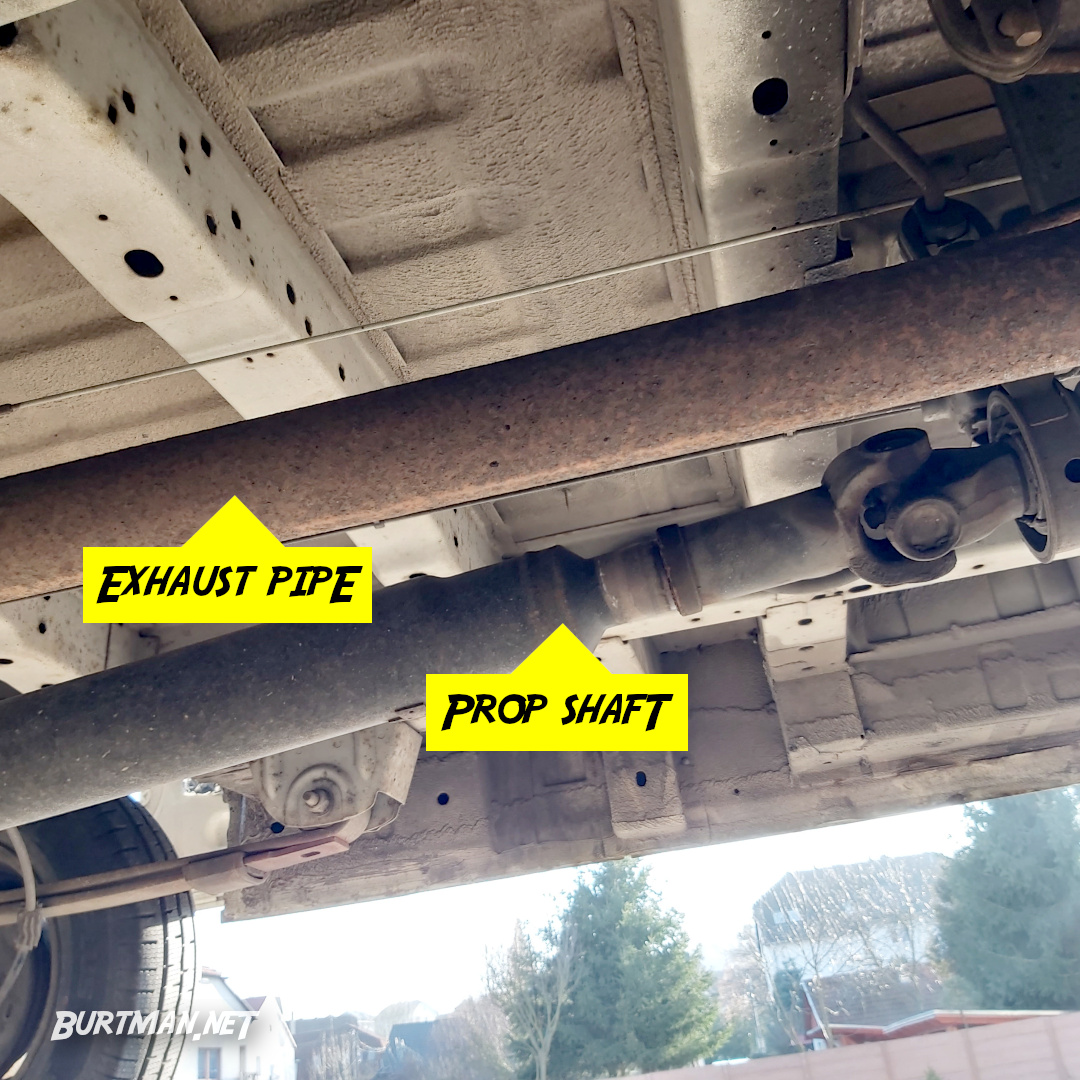
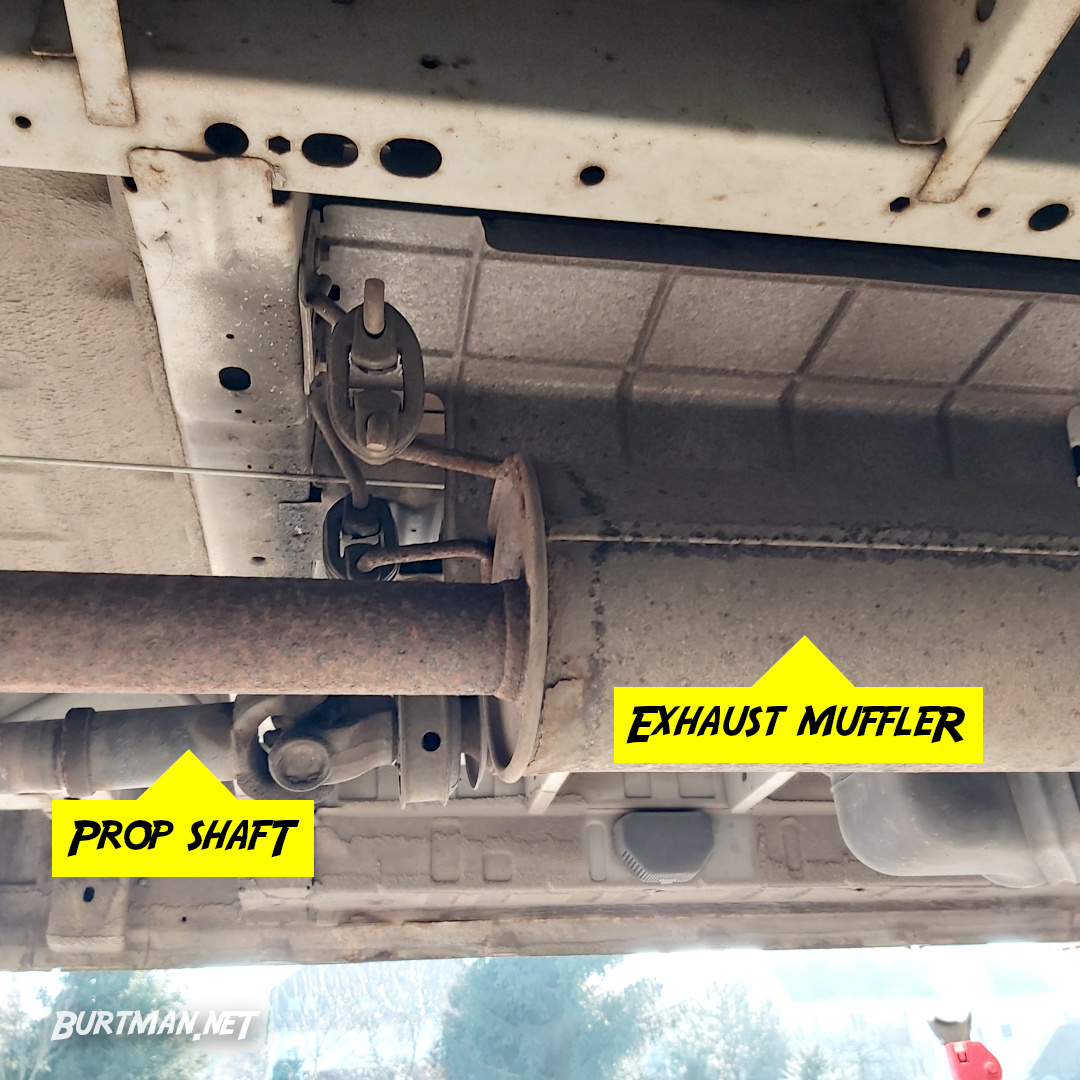
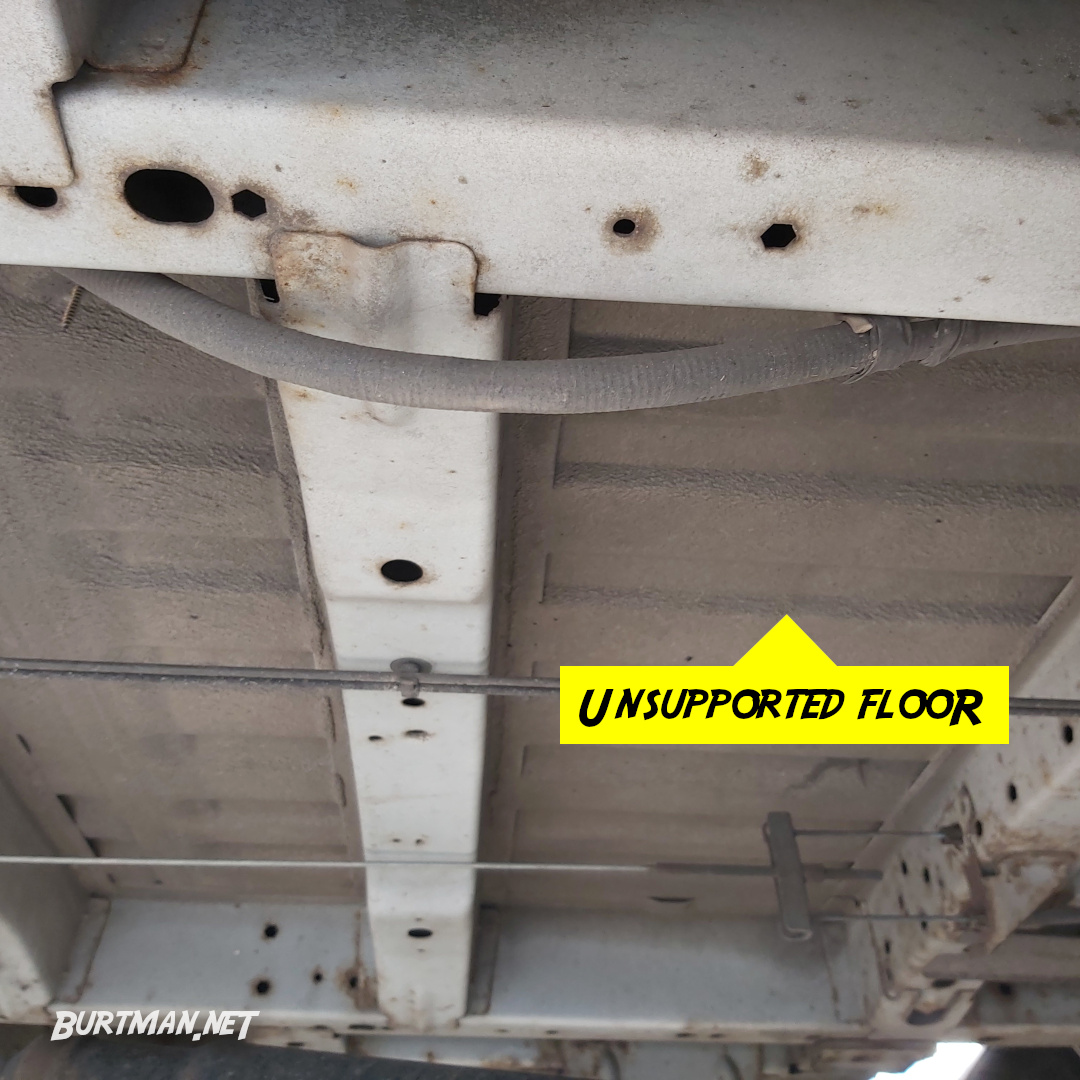
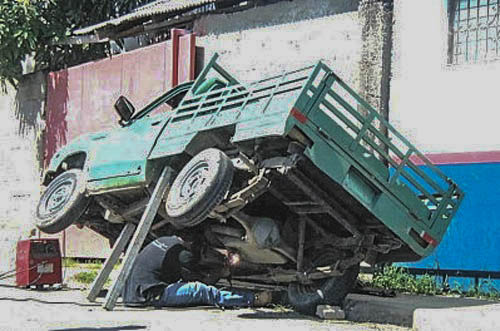
Do NOT place the jack or axle stand on any part of the exhaust system, flat flooring, fuel tank or any part that you can't identify. Chances are, you will crush that component and leave your vehicle in a non-running state. Also be careful not to trap any cables or pipelines between the vehicle and the jack.
Extremely unsuitable jacking points.
Before You Lift
Make sure the vehicle is on a flat surface and not blocking access for anyone. In a breakdown situation, do the best you can.
Depending on the job you are carrying out, it may not always be possible to apply the hand brake before lifting the vehicle. In this case, make sure you chock the wheels that will remain on the ground and put the vehicle in gear if the powered wheels will remain on the ground. In the case of rear wheel drive, your gearbox and handbrake both affect rear wheels only, so lifting the rear wheels will make your use of gears and handbrake obsolete for preventing vehicle movement. Chocks will be your only option, so make sure you have good quality chocks and place them firmly against the wheels that will remain on the ground. Give them a good kick to make sure they're not going anywhere and if you have more than two chocks, put one each side of each wheel.
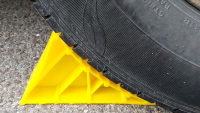
Unsuitable ground for chocking or lifting.
Just a foot from the grass, a much better surface.
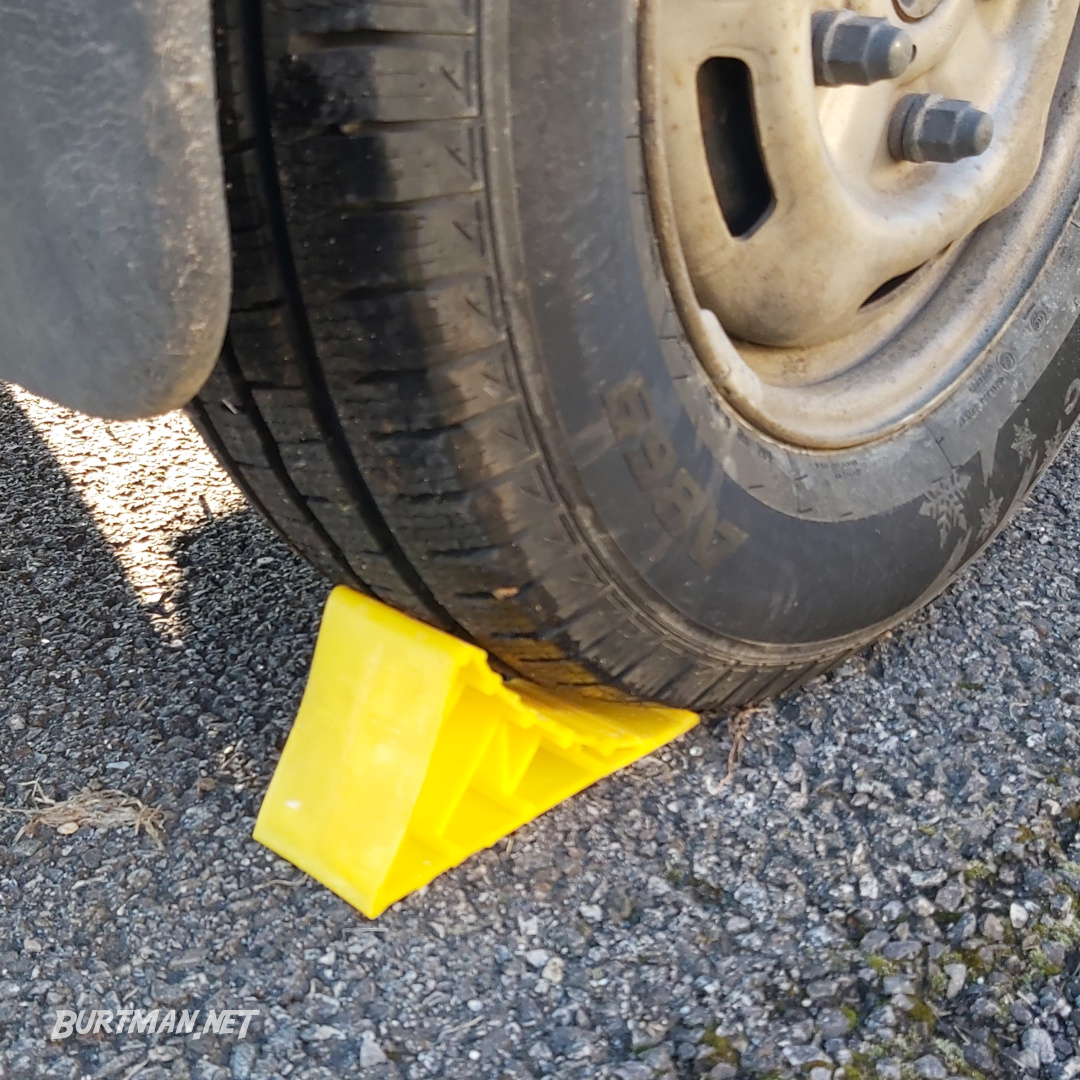
Get it chocked.
Before you lift, make sure it is clear that you are going to be lifting your vehicle - you may need to wear a hi-vis jacket and mark the area in some way to alert other road users. Use your warning triangle if necessary (placed a good distance back from you, so people have time to respond to it).
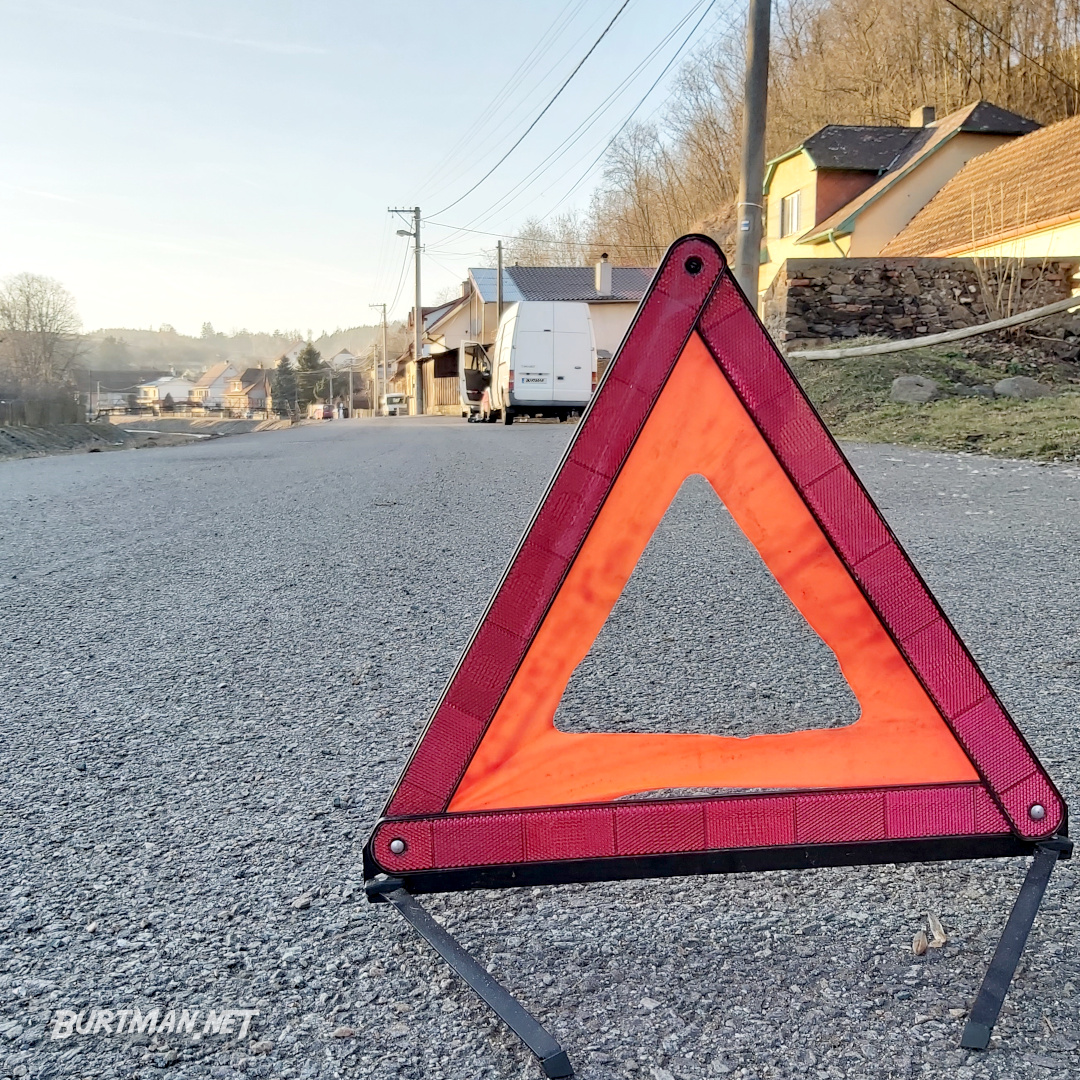
Your reflective warning triangle tells people that there is an accident or unusual situation ahead.
Be sure to place your jack on a flat surface, directly below the jacking point. As the jack rises, keep checking that it is not leaning in any direction. It should rise directly upwards. If it starts to lean, your vehicle could fall off the jack. Immediately stop lifting, carefully lower the vehicle back to the ground and correct the angle.
If you are sure that everything is as safe as it can be, begin lifting the vehicle and have your ale stands close by for use as soon as the vehicle is high enough. Axle stands are crucial for all lifting and should be carried at all times in case of breakdown.
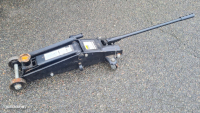
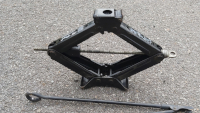
Scissor Jack
This is the most common jack type you will find in most cars. The reason is because it's light and cheap to make. And those are terrible reasons to choose a jack. The worst reasons. That said, you may still find yourself without an alternative, so how to use this jack type safely is well worth knowing.
Following all the info above, place your scissor jack on its base and hook the winding handle into the circular receiver.
If this step is challenging, jacking is not for you.
Begin winding the handle until the jack is almost tall enough to touch the jacking point you have chosen, then place it beneath the jacking point and align it carefully. Continue winding, slowly, until the jack comes into contact with your chosen jacking point, then check again that it is completely vertical and as stable as it can be (given its relatively small base).
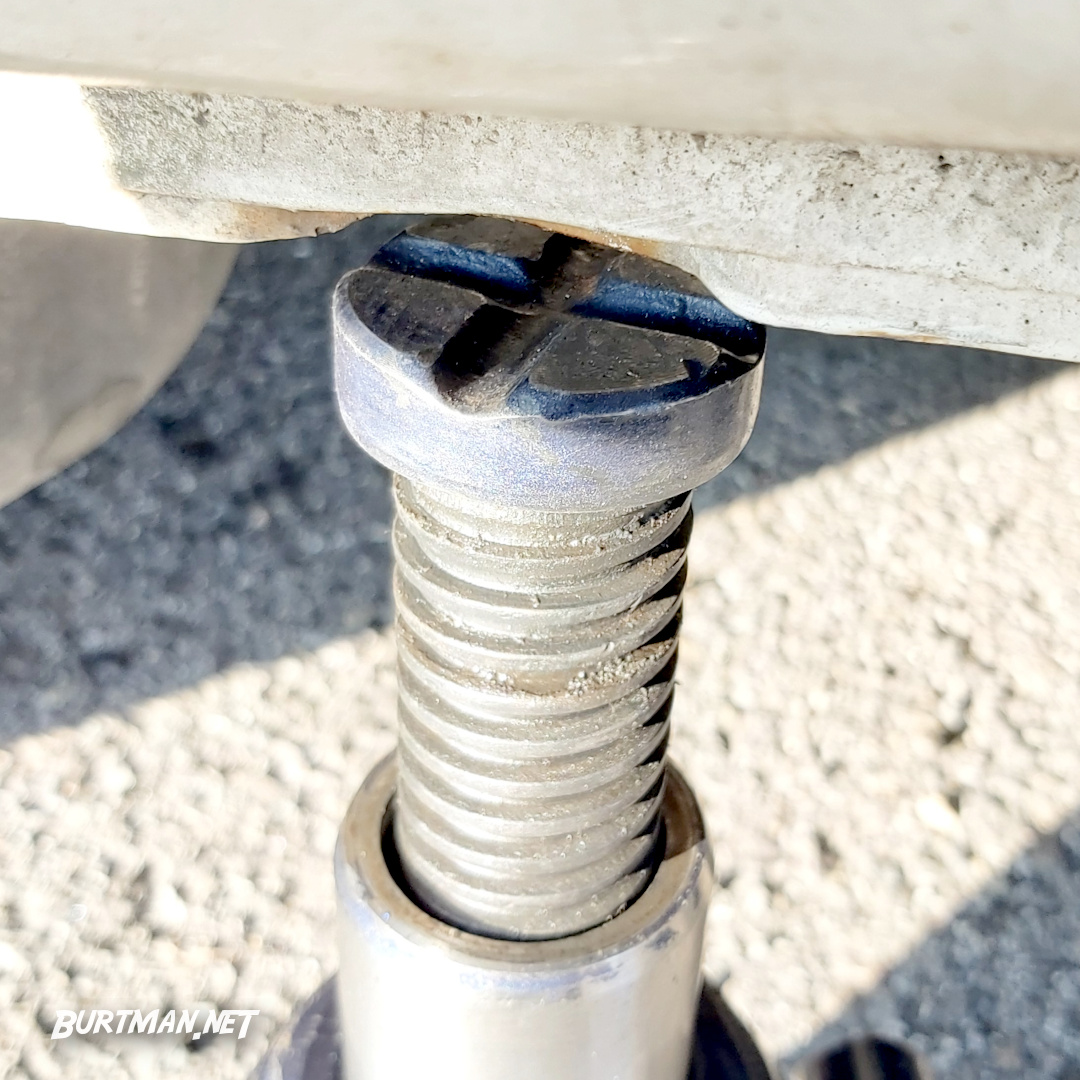
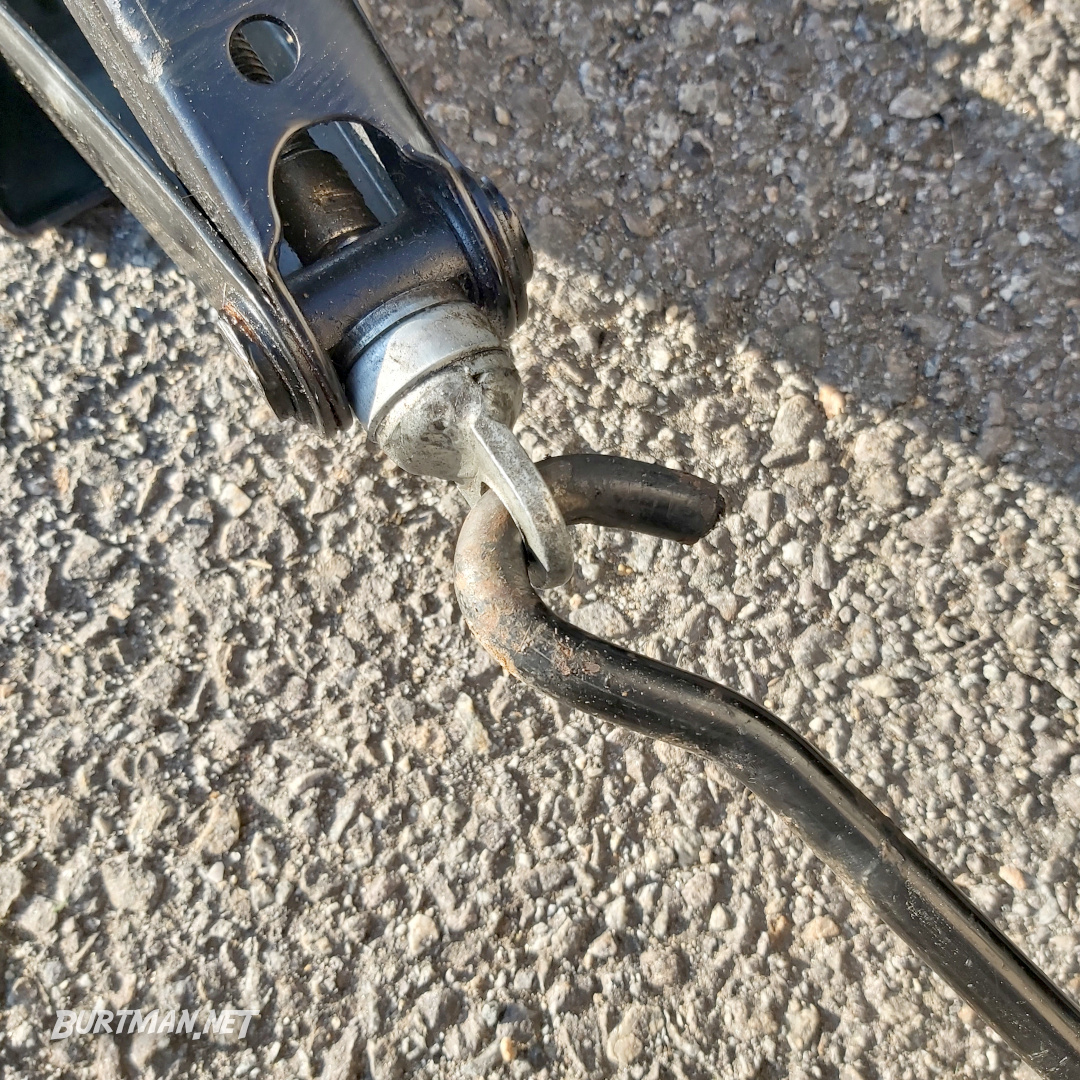
If your chosen jacking point is a strong bolt, such as this subframe bolt, flip the protruding bolt receiver (the flappy bit) over the top, so the jack will support the area all around the bolt and not risk slipping on the bolt head itself.
The flappy bit.

See how that works?
Proceed to lift the vehicle slowly by continuing to rotate the winding handle, all the while checking the stability of the lift, position, angle and that the jack is not slipping. When the vehicle is high enough, insert the axle stand as above.
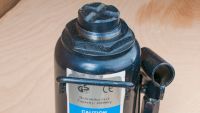
Piston / Bottle Jack
Before lifting, screw the top surface of the bottle jack counter-clockwise to extend its height as much as possible. Bottle jacks are short, so this built-in extension is usually required.
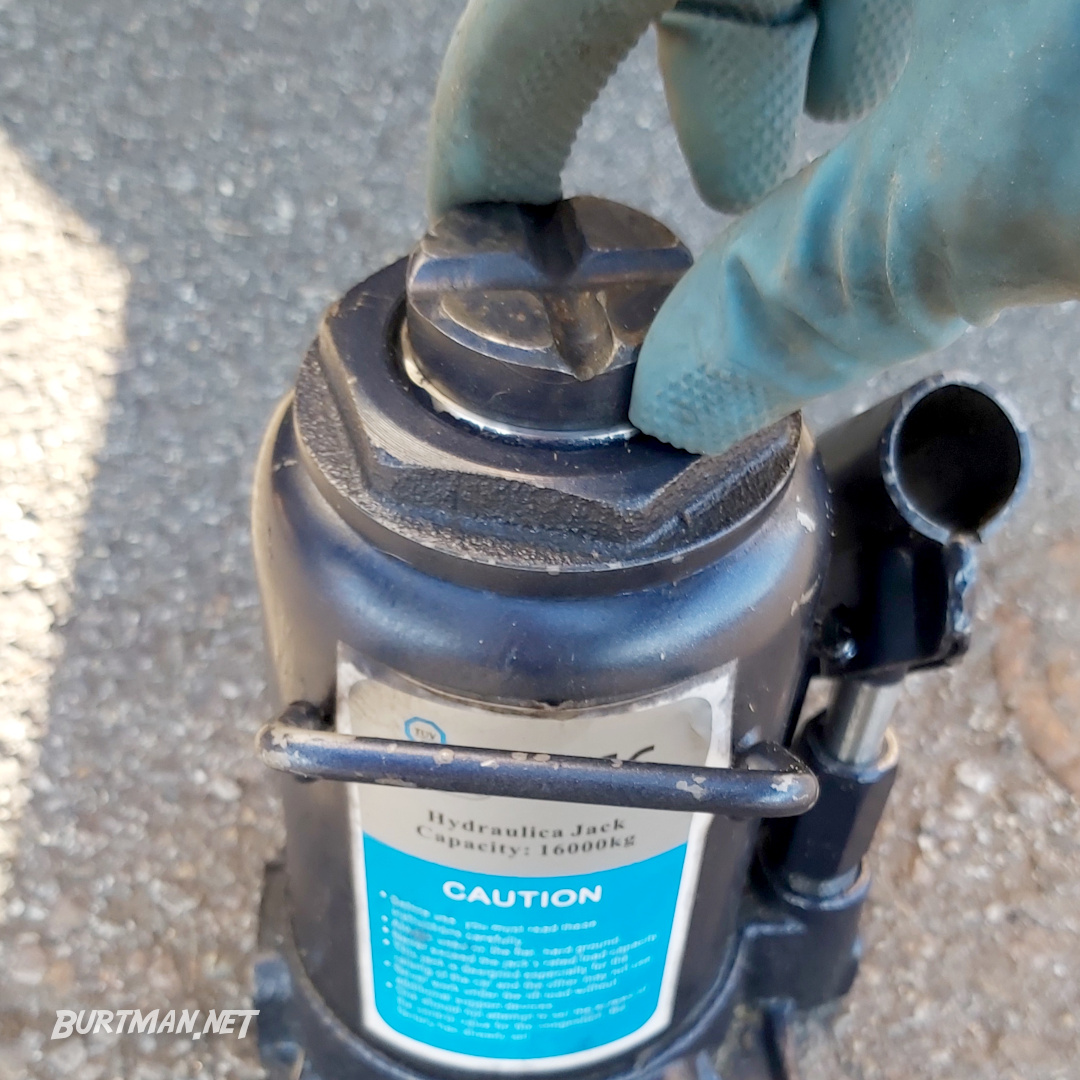
Twist this part counter-clockwise...
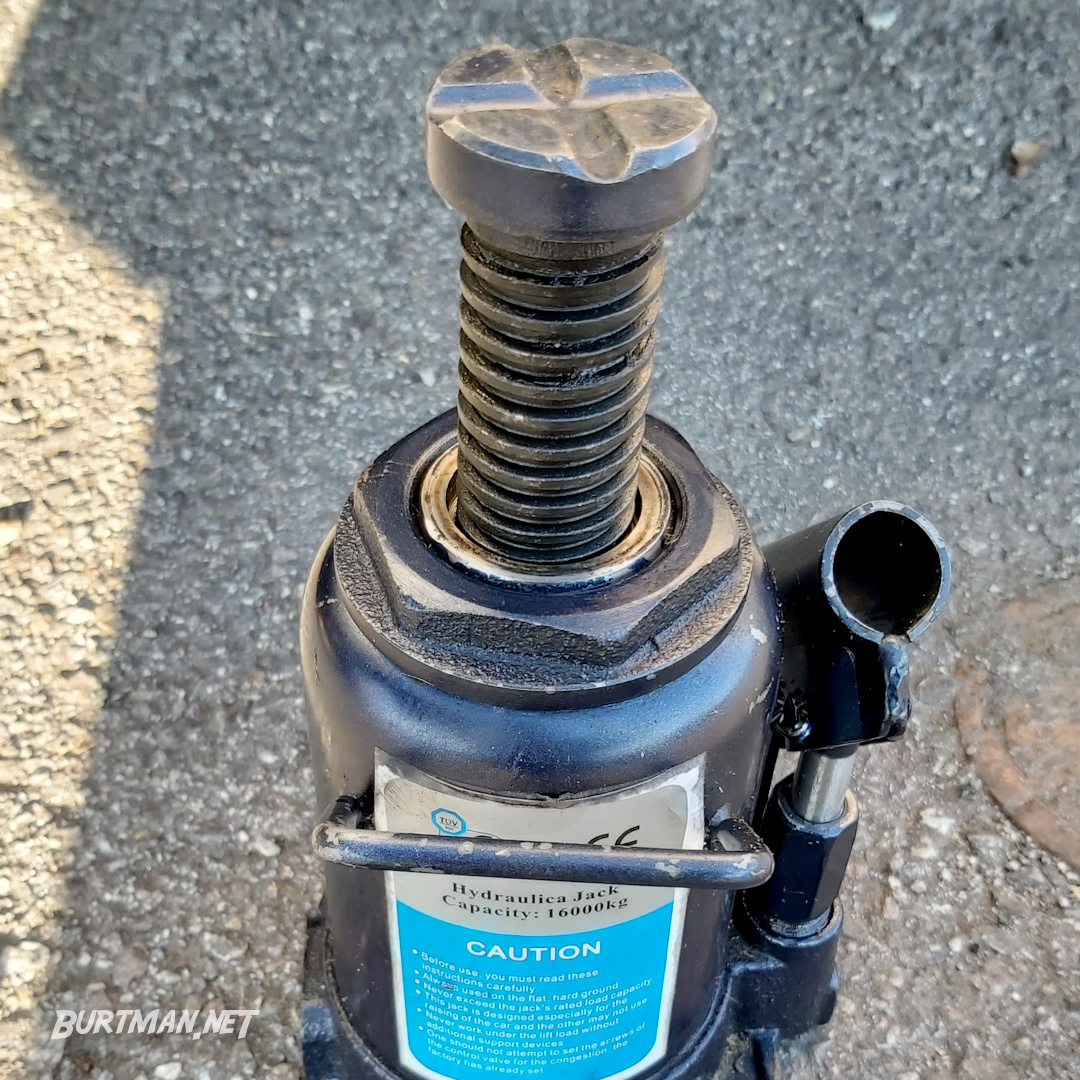
...until it looks like this.
Tighten the pressure valve at the bottom of the jack as tightly as you can by hand, then place the lifting handle into the cylindrical receiver and begin pumping the handle up and down. The jack will rise in small increments. Once it makes contact with your chosen jacking point, check the angle and position and continue pumping slowly until the vehicle reaches the height where you can insert an axle stand.
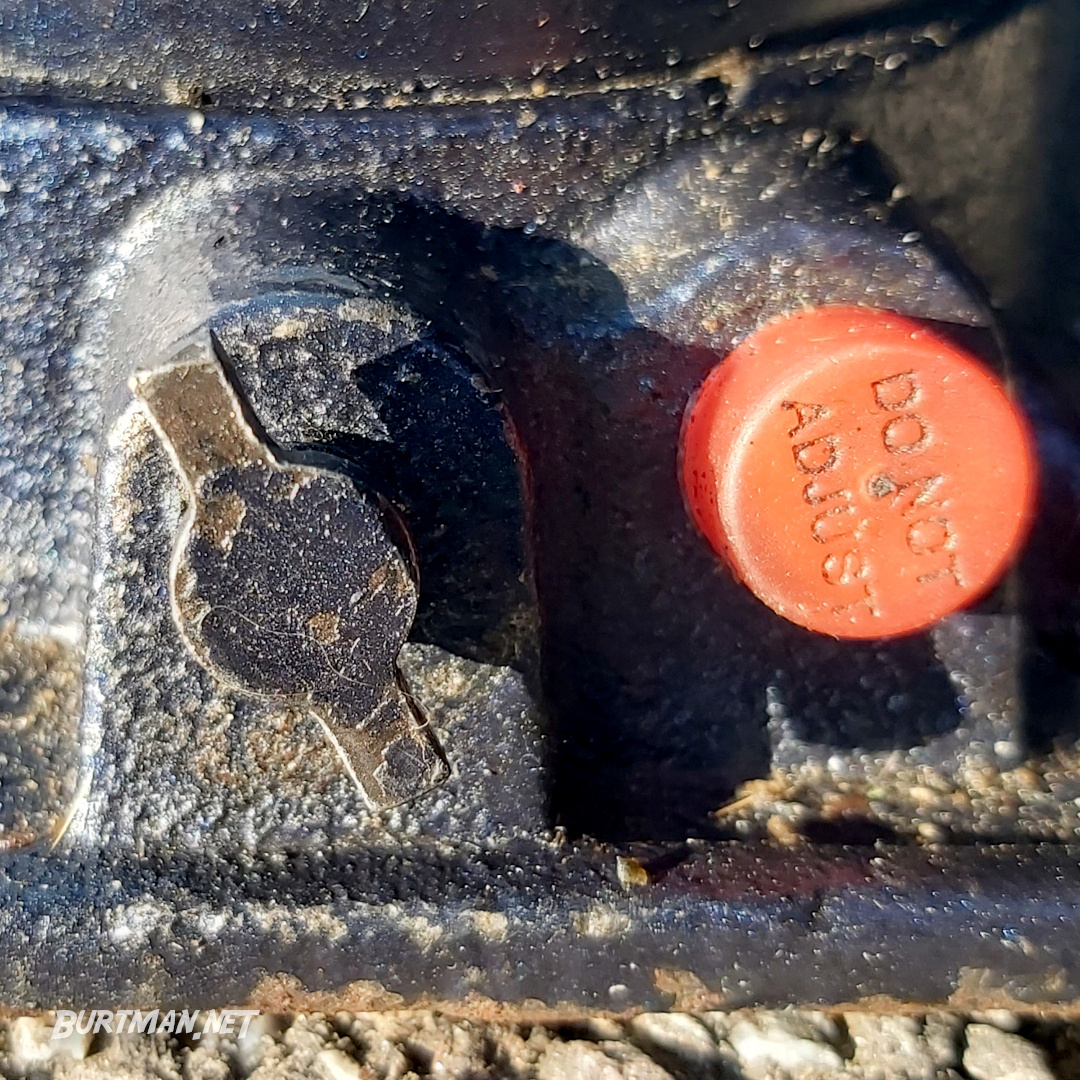
This valve is common to all hydraulic jacks. Do not adjust the one that says- nevermind. You got this.
When you are ready to remove the jack, turn the pressure valve counter-clockwise VERY slowly and by just a tiny amount, until the vehicle starts to move downward. Do not be tempted to hurry this up by releasing the valve further, as doing so can cause the vehicle to come down much faster than expected, possibly causing injury or damage. Take it very slowly and be patient. You can speed up descent by loosening the valve, but do it by a tiny amount at a time and be ready to tighten it again, in case you loosen it too much.
Trolley Jack
This is the biggest, heaviest and (therefore) most stable type of jack you are likely to carry in your vehicle. You may even need help removing it from the storage area and please be very careful not to trap fingers or toes when you put it on the ground.
The operation of the trolley jack is almost identical to the bottle jack above, but the jack itself will not move directly upwards. For this reason, you will need to adjust the placement of the jack as it approaches the jacking point. Make sure that, at the moment of contact with the vehicle, the jacking point sits across the center of the jacking pad, not across one side or on the edge. This will ensure a safe and stable lift.
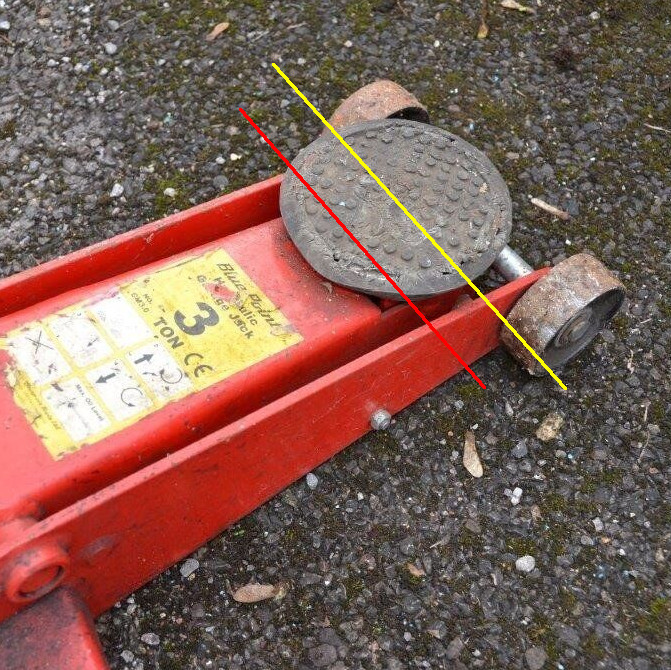
Yellow: Safe, Red: NOT safe. Temporary image.
Lift the vehicle as much as necessary and place the axle stand in a suitable location when possible.
You don't need to lift it to the second floor. It only needs to go high enough to place the axle stand somewhere safe.
That's not an axle stand and that's not two inches.
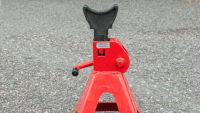
Axle Stand Placement
Once the vehicle is lifted high enough to place an axle stand, make sure that the stand is properly locked and try to place it in a location that will take the weight of the vehicle without risk of damage. Make sure the stand is not placed too close to the center of balance, as you do not want the vehicle to roll off the stand. If you need to lift both rear wheels, for example, use two axle stands, placing one on each side of the vehicle, rather than trying to use one stand in the middle.
Once the axle stand is in place, you can either remove the jack by slowly releasing the pressure or winding it backwards, or (if it's not in the way), keep the jack in place as a backup lift. However, do not rely on the jack alone to maintain the weight of the vehicle while you work. Doing so is very risky and frankly, asking for it.
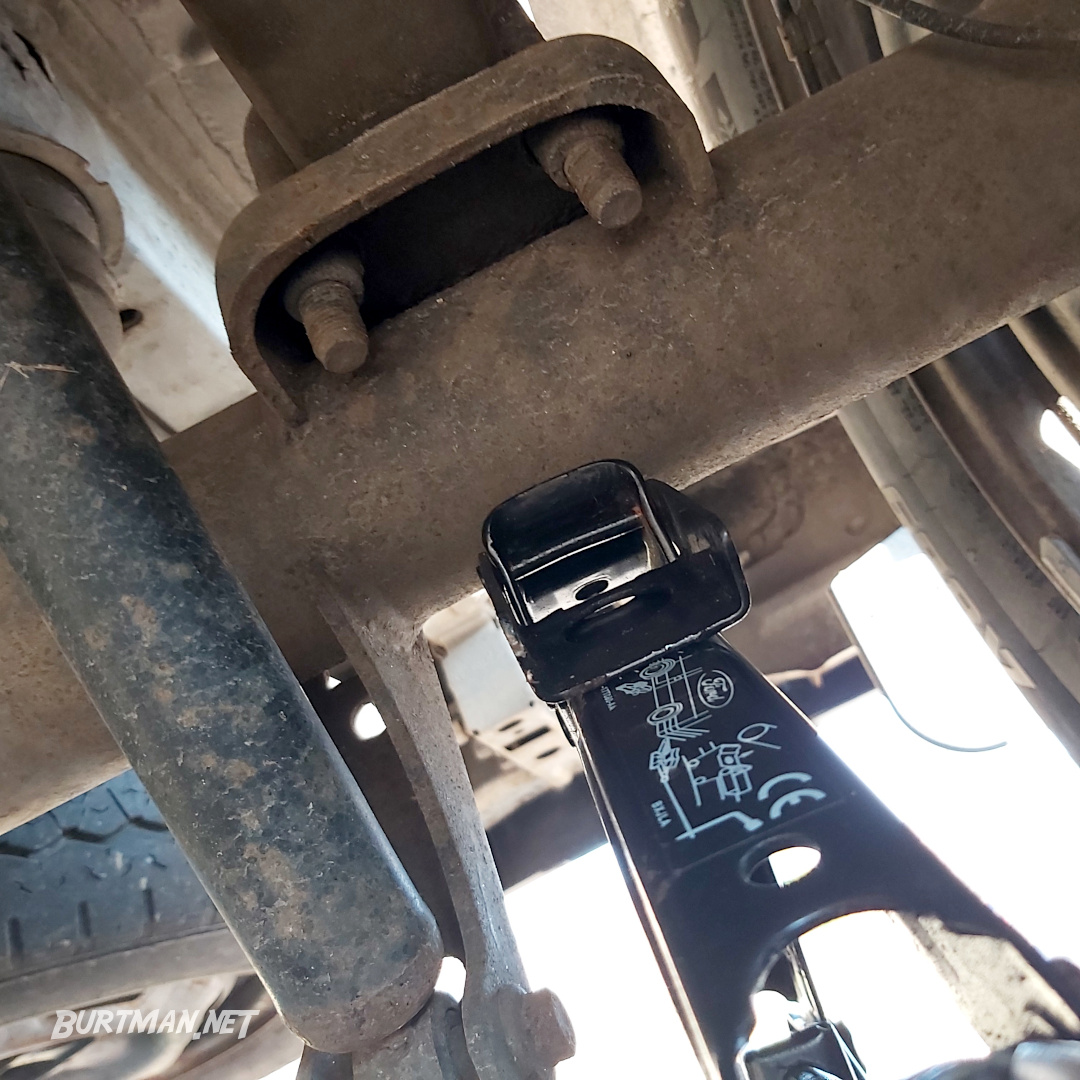
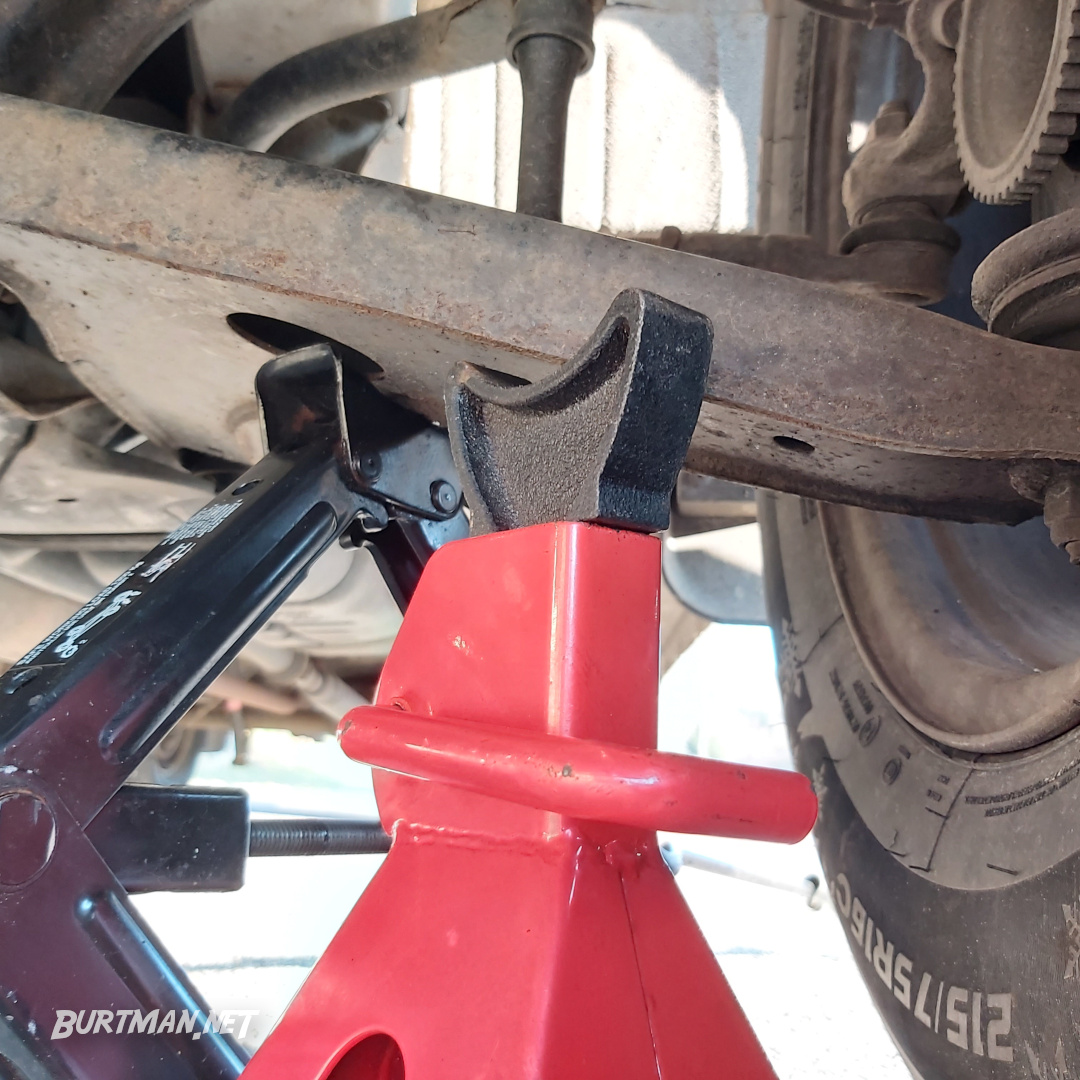
Axle stand under the rear axle.
Under the front wishbone. This may look like a dodgy angle, but the wishbone has a flat notch in it that is currently obscured by the axle stand. It's that notch that the axle stand is supporting.
As you might have noticed, this axle stand is at its lowest position. Sometimes, though, it may be necessary to extend the height of the axle stand(s) in order to carry out a particular job. If you realize you need to do this after removing or slackening the jack, make sure to follow the jacking process from the beginning to ensure you don't miss any important steps. Once the jack is ready to lift the vehicle higher, take it as high as you need to without removing the axle stand, then, after making sure the jack is secure, extend the axle stand. Again, check the position and angle of the stand before allowing the vehicle's weight to rest on it.
If everything went according to the steps above, you can now return to whichever article sent you here and continue with the job.
To lower the vehicle, just lift if off the axle stand, remove the stand, and slowly lower the jack, either by carefully loosening the pressure valve and waiting for the jack to descend, or by winding the scissor jack counter-clockwise until the jack is free to move.