
Replace Your Alternator
 Let's Get Technical
 For Everyone
Updated:
It is extremely dangerous to work with a running engine. Make sure you remove any loose or hanging clothing or jewelry before you start this job, as anything that gets caught in a running engine is going to be pulled into it with extreme force.
If you're always needing a jump start, or your lights all go out while you're on the road, then your battery isn't charging [ properly / enough / at all ]. Although this can be caused by a bad earth, incorrect battery type for your van, dying battery, or other things, we're going to suspect the alternator, first of all. That's mainly because it's the easiest thing to rule out in such situations. So let's have a look at the damn thing and see if it's the reason for our sad faces.
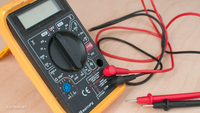
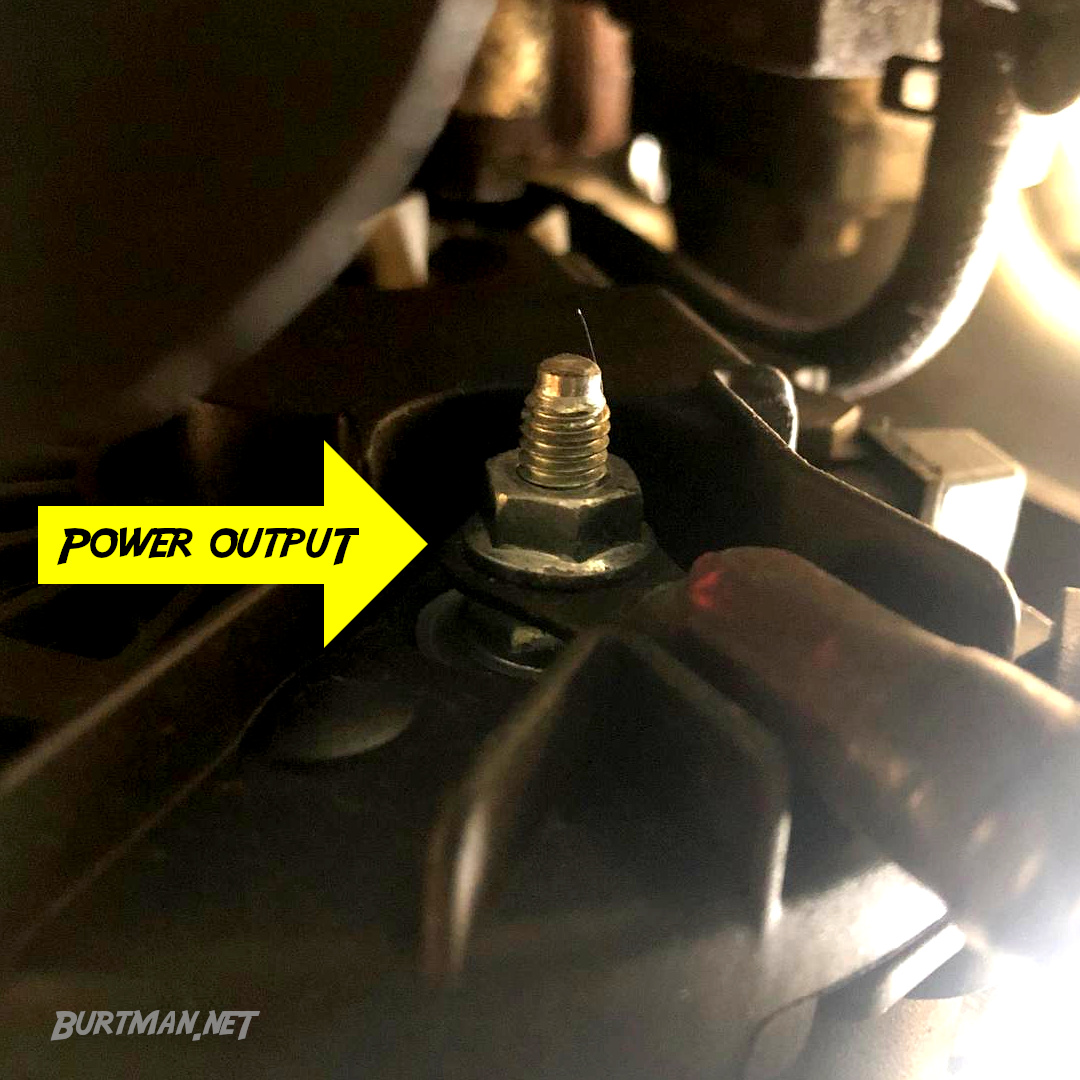
First, let's check the alternator output with a multimeter. Set the meter to 20v in the DC section and touch the red probe to the power connection on the back of the alternator and the black probe to the alternator casing. If the reading on the multimeter is a solid 14.4 volts1, the alternator's just fine. In that case, the problem with your charging system lies elsewhere - possibly in the connections between the alternator and the battery. We'll check that next.
With the engine switched off, remove the power cables2 connected to the back of the alternator and scratch the connectors with a piece of sand paper to ensure that the metal is not caked in oil, grease, dirt, or cake. The metal connectors need to be bare in order to carry the electrical current.
A clean terminal means a clean connection.
Having cleaned the terminal and cable (if necessary), you know you have a good connection to the battery, so now you need to test the battery voltage when the engine is running. It should be 14.4 volts with the basic electrical load (turn off everything you can turn off to get down to the basic electrical load). If you're seeing something closer to 12 volts, or even less, you're not getting so much as a howdy-do from your alternator. If you're getting something close to 13 volts, your alternator is struggling to provide enough power, and that could be due to the regulator on the back of the unit giving up, or the unit itself. In any case, the unit needs attention.
If you have good voltage right up to the battery, then the battery itself is the problem. You can look into that here. For the purpose of this article, though, we'll assume that the alternator has been found to be at fault. Now, you can take the alternator to a specialist and have them inspect and refurbish it, or you can save yourself all the hassle and get over to ebay to find a brand new one for a fairly good price. Mine was €85. Either way, you're going to take this one off and be fitting something back on, so let's look at that next.
1. Pop the hood and locate the auxiliary drive belt tensioner.
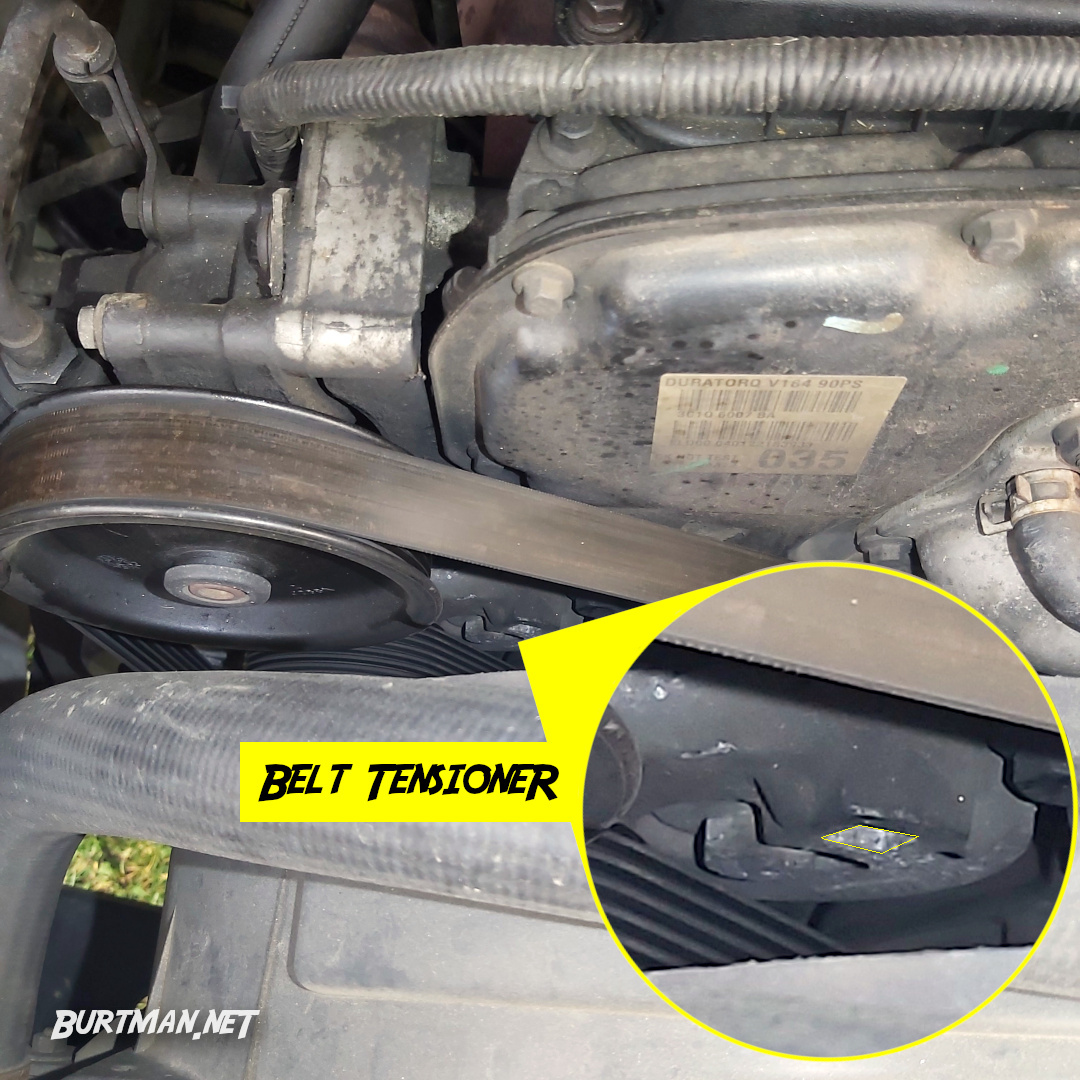
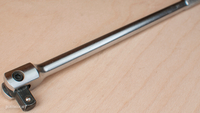
2. Insert the appropriately-sized socket wrench into the tension adjustment inset and turn in whichever direction results in a slackening of the drive belt (it depends on the engine).
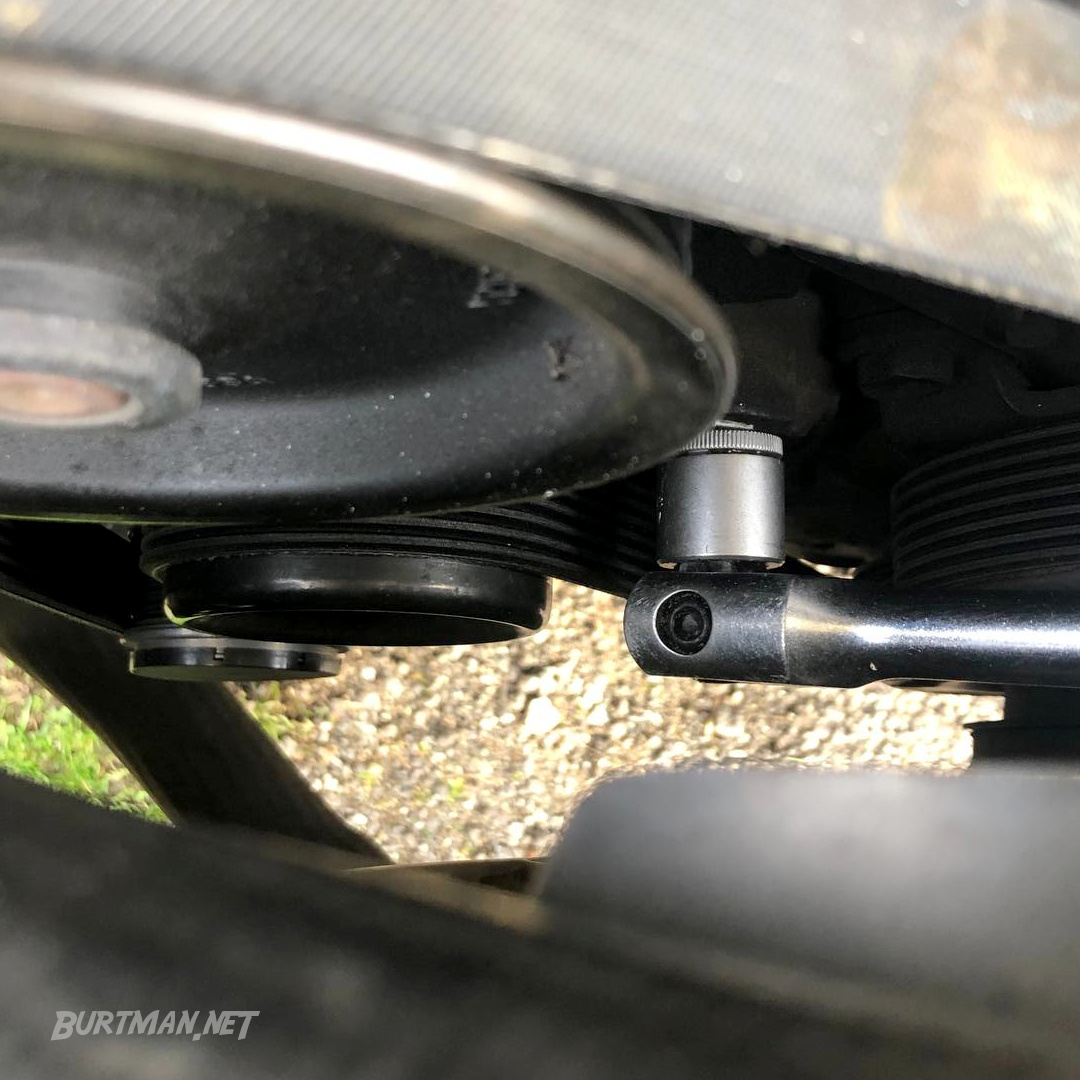
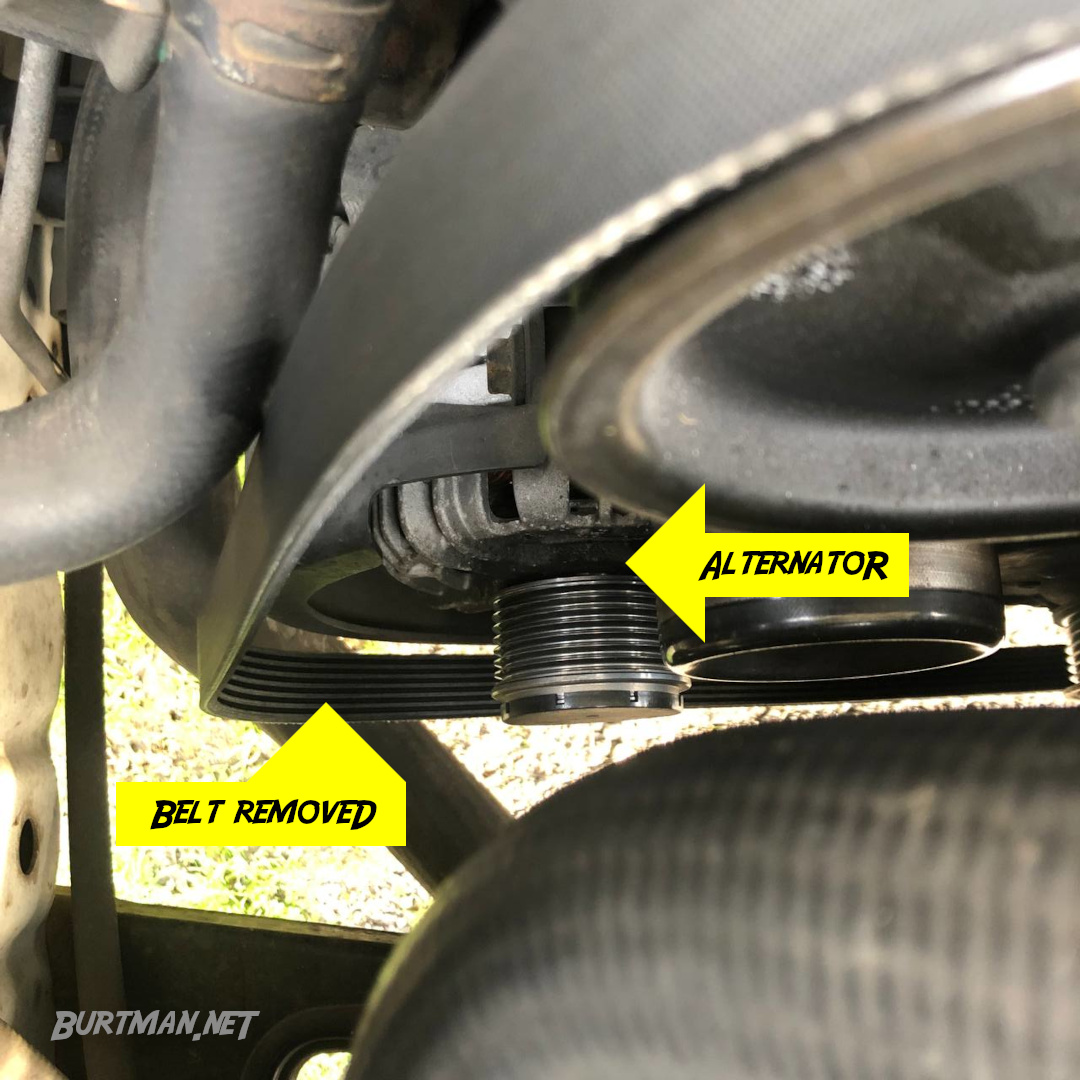
3. Remove the drive belt from the tensioner pulley, by hand, while maintaining pressure on the tensioner with the breaker bar. Trying to remove the belt from one of the ribbed pulleys first isn't going to work out well.
4. Carefully release the pressure on the belt tensioner and allow the breaker bar to rest (you probably won't be able to remove it until the job is done, so just rest it somewhere where it won't move and leave it there). Remember that the breaker bar will be under pressure the entire time, so be careful of potential injuries.
5. Disconnect all electrical cables from the alternator. You will need to remove a small nut (probably 10mm) to release each power cable.
6. Unscrew the long mounting bolts that hold the alternator in position, taking care to support the weight of the unit as the last bolt comes out. It's pretty heavy and having it land on your face isn't going to help. If the alternator is stuck in position by rust or road junk, you may need to thump it with a rubber mallet. Keep supporting its weight, as it will drop suddenly when it gives in.

Now, take your new alternator, or your refurbished old one, and put it back together in the opposite order. When the alternator is securely fitted, and the cables are properly connected, push on the breaker bar again to open the belt tensioner, refit the belt carefully around the tensioner pulley, taking care to keep the belt properly seated on all other pulleys, and carefully release pressure on the breaker bar when done. Check that the belt is properly seated in the grooves of all pulleys again before continuing, as starting the engine with the belt improperly seated can be dangerous and may result in serious damage to the engine (the belt can come right off or be severely damaged, resulting in the biggest headache you've ever had).
Remove the breaker bar and congratulate yourself quietly, so your neighbors don't hear you.
When you're happy with everything you just did and checked, start the engine and re-test the battery voltage. You should now see the 14.4 volts you were hoping for in the beginning.
Considerations
1If you have a start-stop battery fitted, your alternator output could be as high as 15.8 volts. You will have to check in your van's manual for the specific voltage, as it can differ significantly by battery type and manufacturer.
2 If you only see one cable attached to your alternator, the earth side of the circuit is coming via the case (remember, your entire van's body and most of the engine is connected to the negative battery terminal, so almost any exposed metal is an earth).